Change the orientation of your slide deck in a few clicks.
Google Slides is a popular presentation design tool. It's relatively simple to work with and offers many features for customization, multimedia, accessibility, and more. While Slides makes it relatively easy to create online slideshows, you may hit a brick wall if you try to change the orientation of your slides. In this article, we’ll review the steps you can take to make your presentation vertical.
What is Google Slides?
Google Slides is a web-based presentation software solution, which is also a part of Google Workspace. Individuals and teams can create, edit, and share presentations seamlessly over the internet. It lets you use unique templates to make attractive slideshows for various purposes, such as school or work.
Google Slides enables real-time collaboration. Multiple users can work together on a presentation simultaneously, encouraging teamwork and increasing efficiency. You can convey your ideas by adding text, images, charts, and multimedia elements. Plus, Google allows creating and giving presentations from any web-enabled device.
By default, newly created presentations are horizontal (landscape mode) and made for widescreen devices such as computer monitors. But you may have tables, charts, and other graphics that work better vertically (portrait mode) or are more user-friendly for smartphones and tablets. Let’s learn how to change slides to portrait mode.
How do I change the orientation of a Google Slides presentation to vertical?
Changing the slide orientation in Google Slides is a straightforward process. Here are the steps for how to make vertical slides:
Step 1: Open the Google Slides presentation that you want to edit. If you haven't created one yet, start a new presentation.
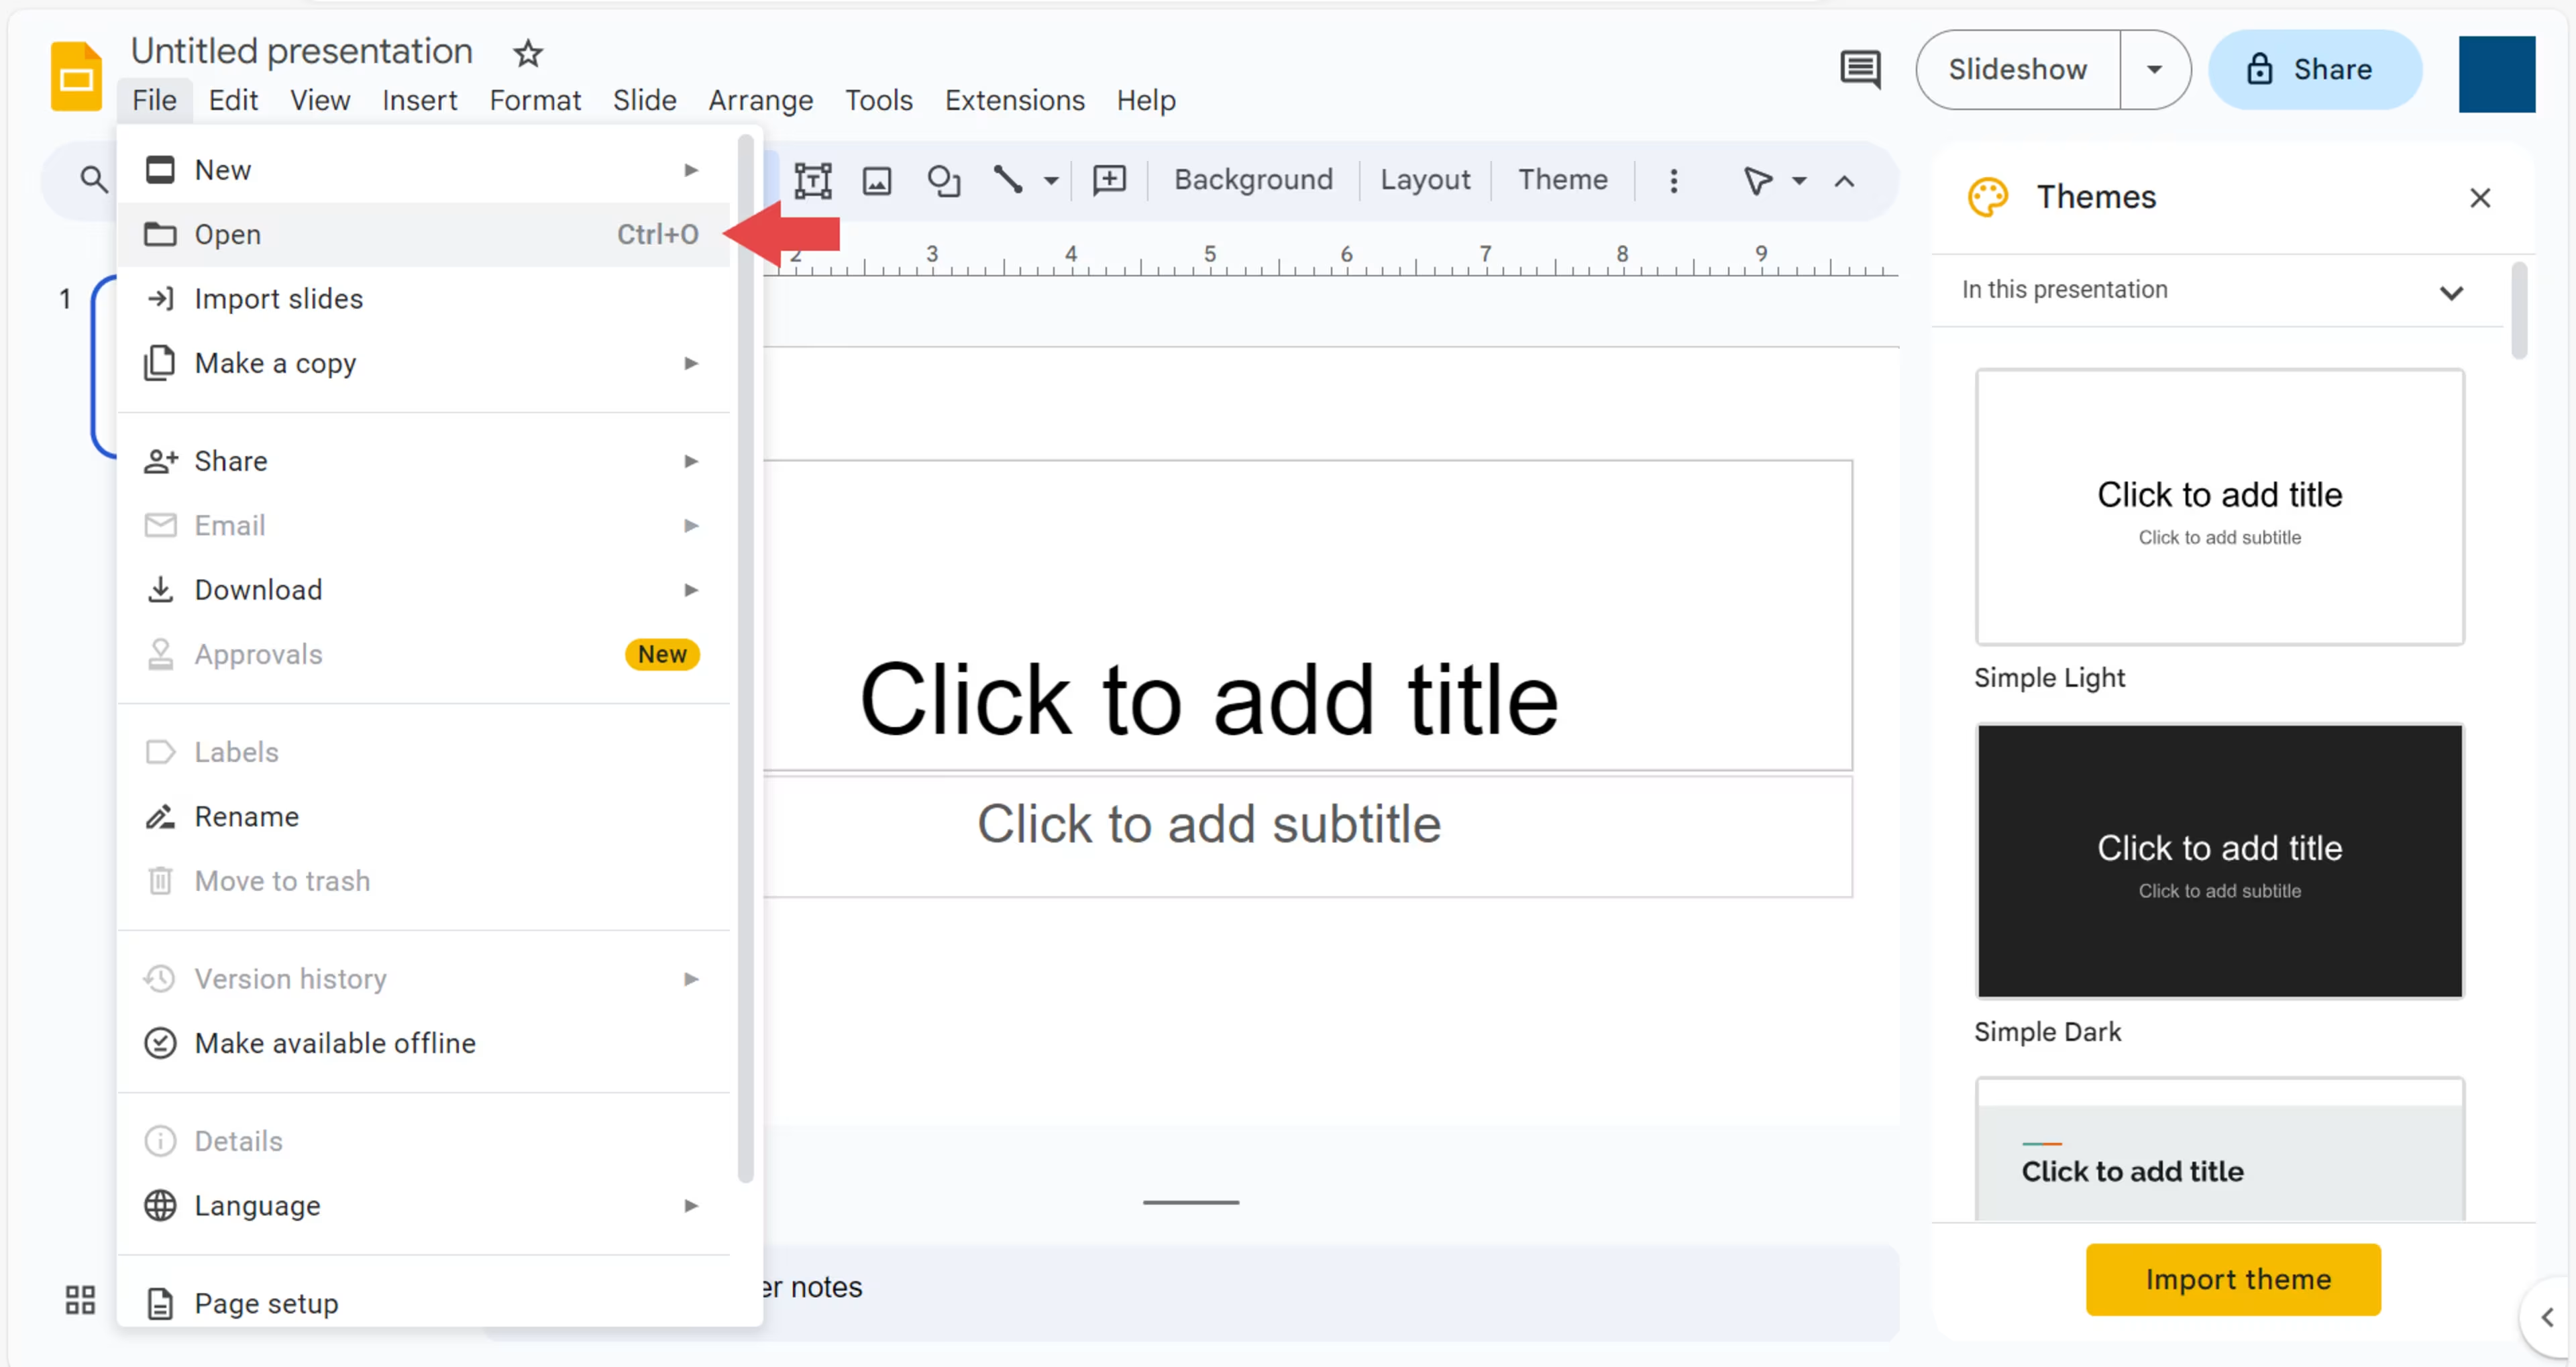
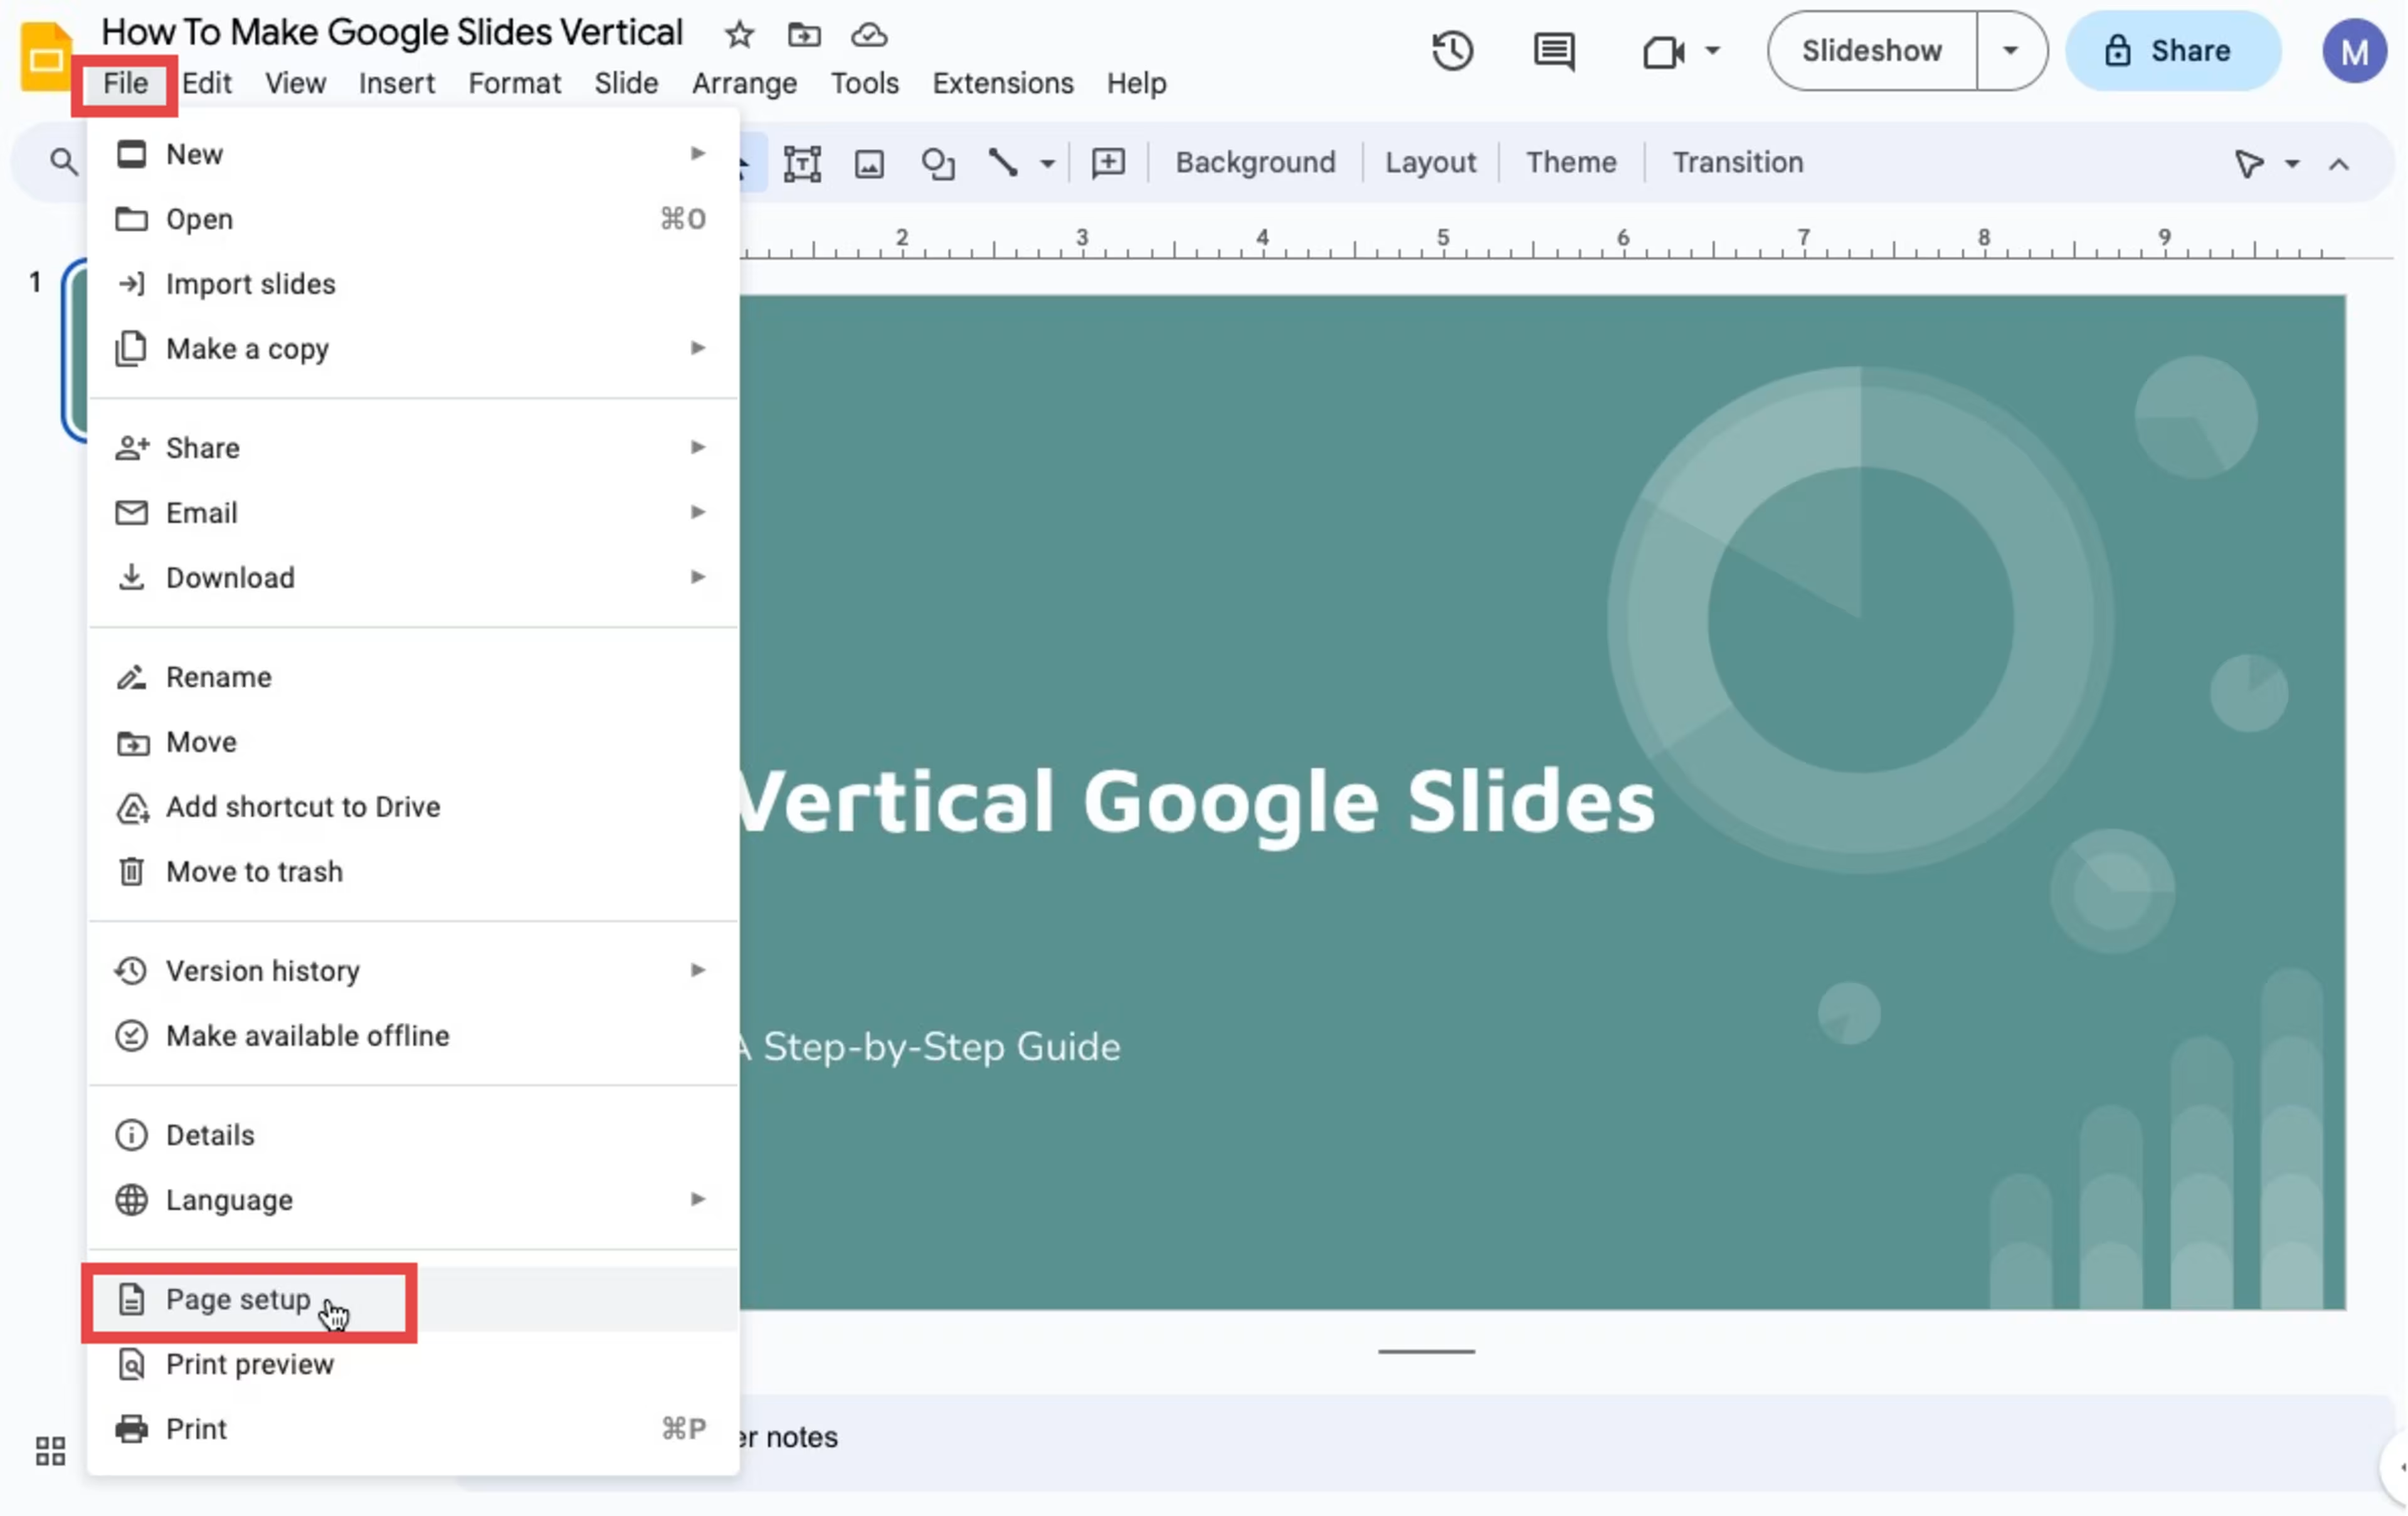
Step 2: Look for the "File" option in the top left corner of the screen. In the "File" menu, click "Page Setup." This option is where you can adjust the settings for your slides.
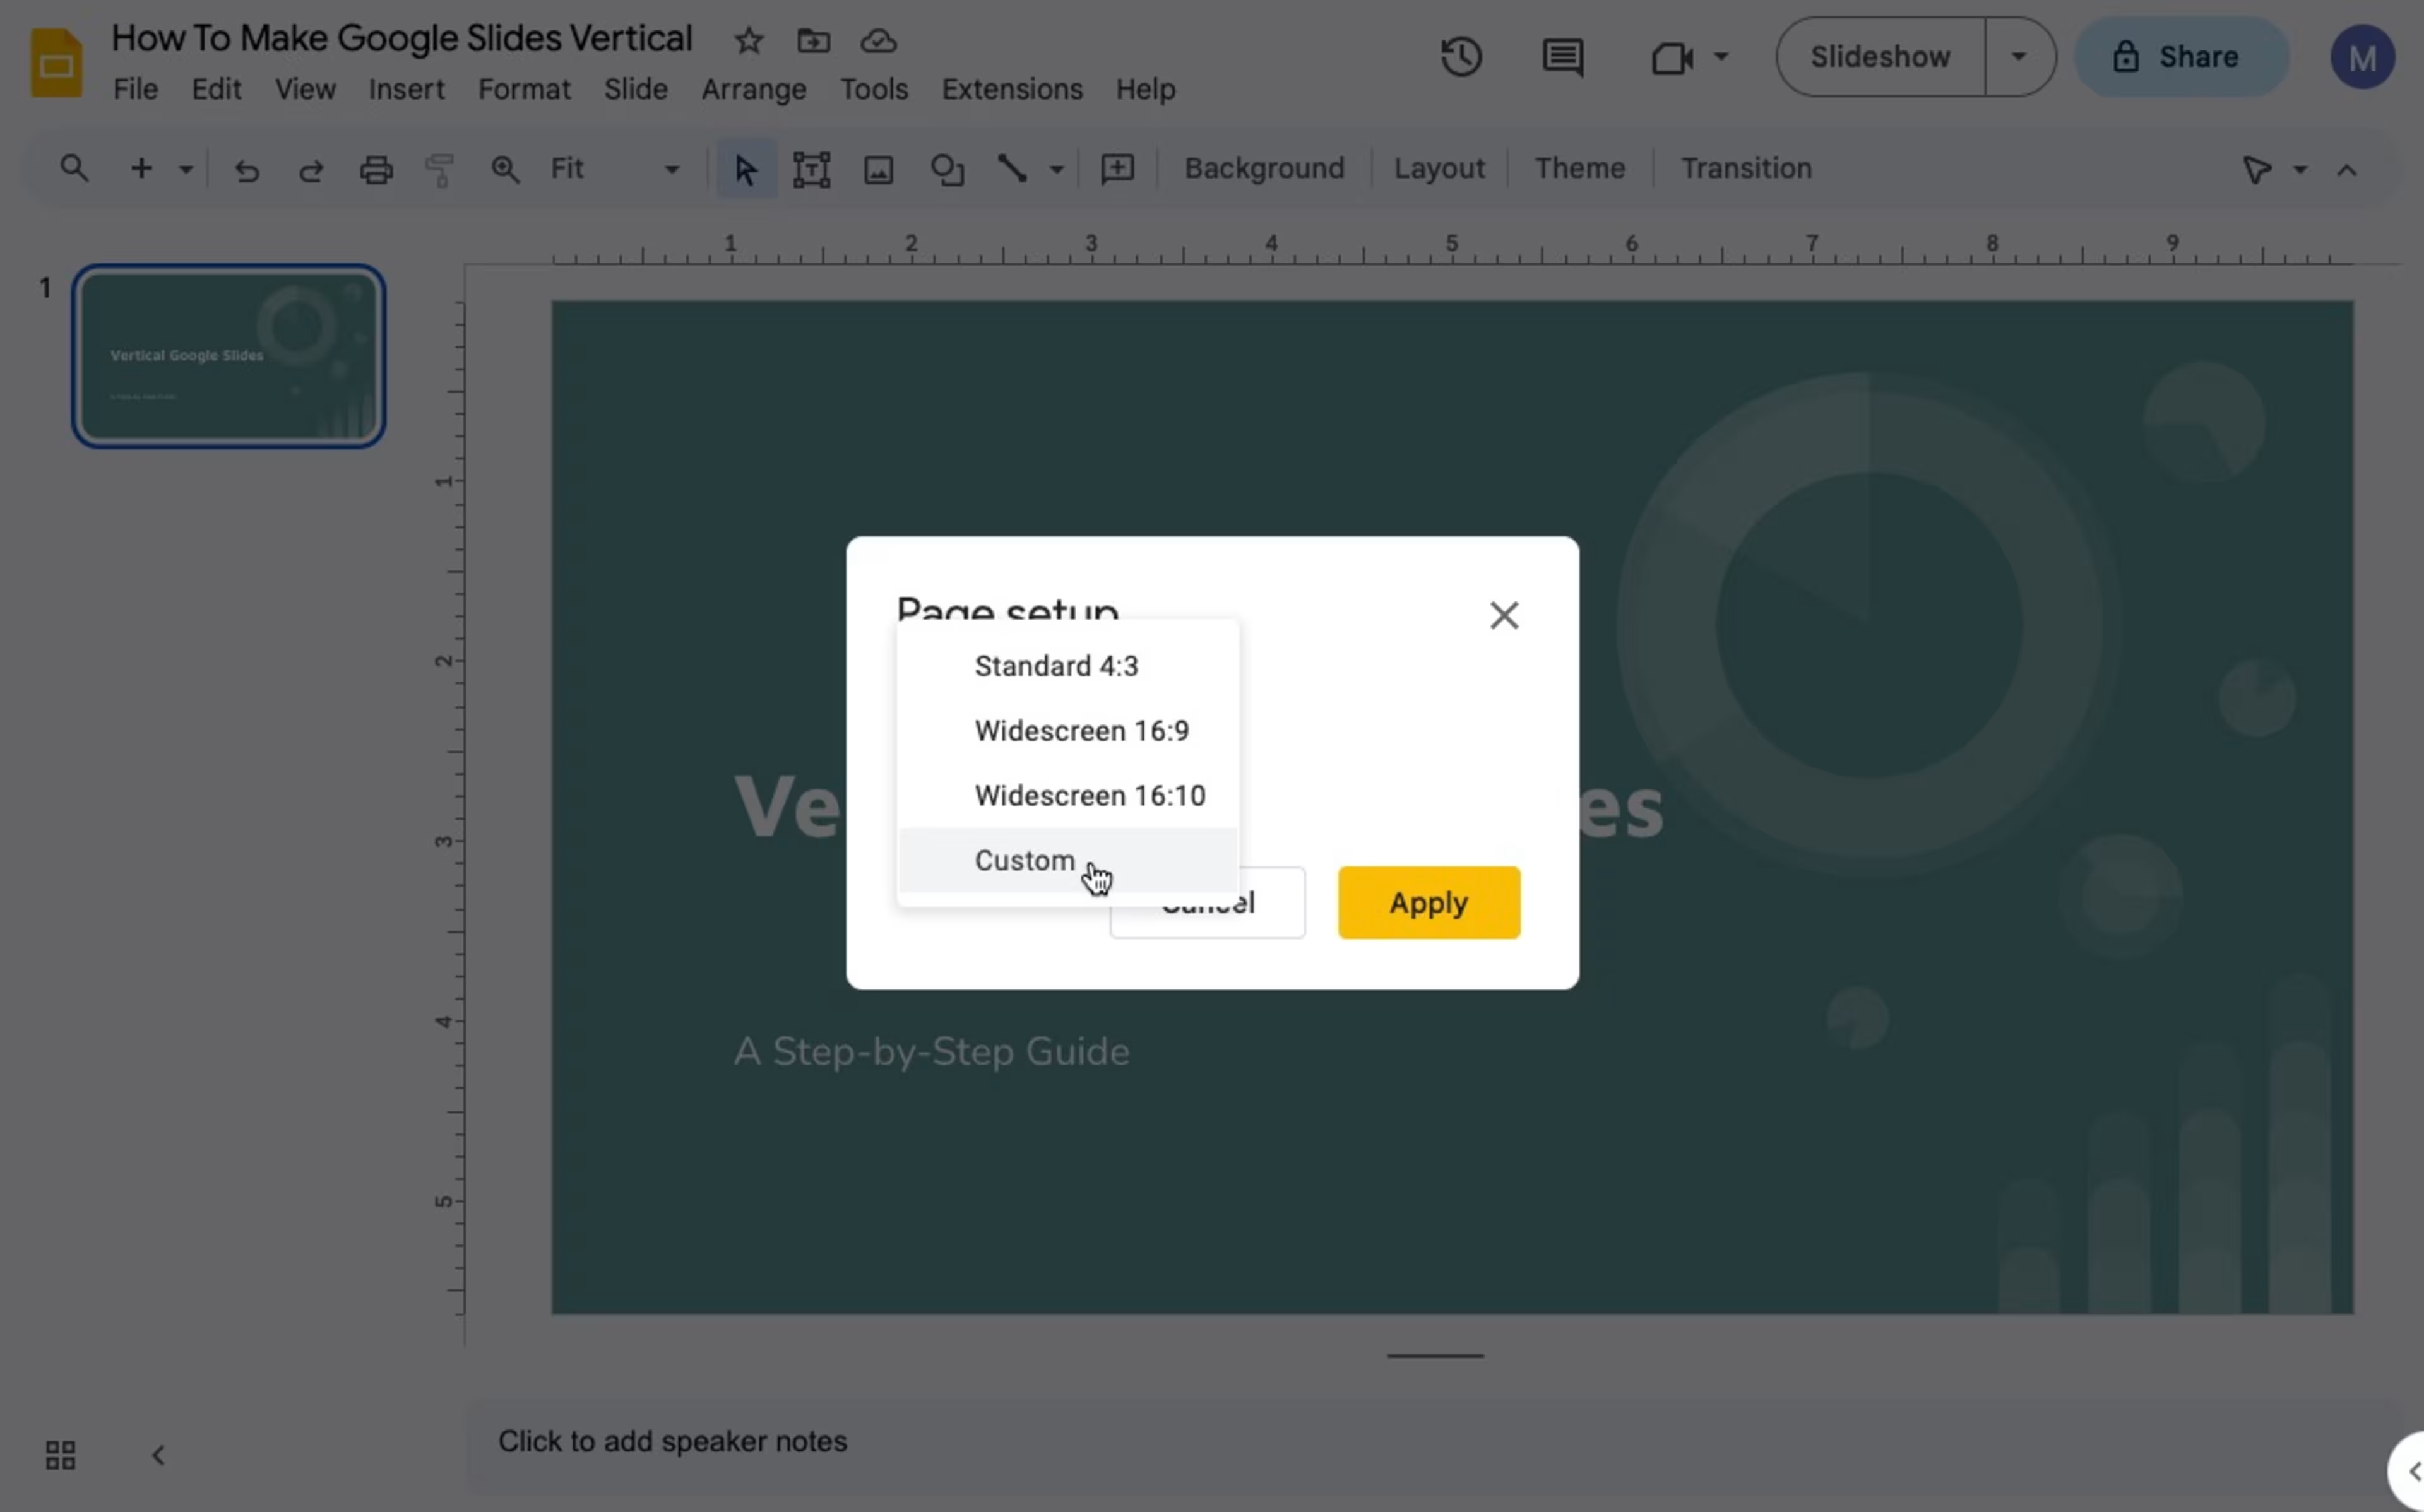
Step 3: In the "Page Setup" dialog box, you will see options for "Standard" and "Widescreen." Choose the "Custom" option.
Step 4: Once you've selected "Custom," you'll see options for width and height. Swap the values for width and height to switch from horizontal to vertical or vice versa. For example, if your slides measure 13.3" x 7.5" (widescreen), you might change it to 7.5” x 13.3” (custom vertical).
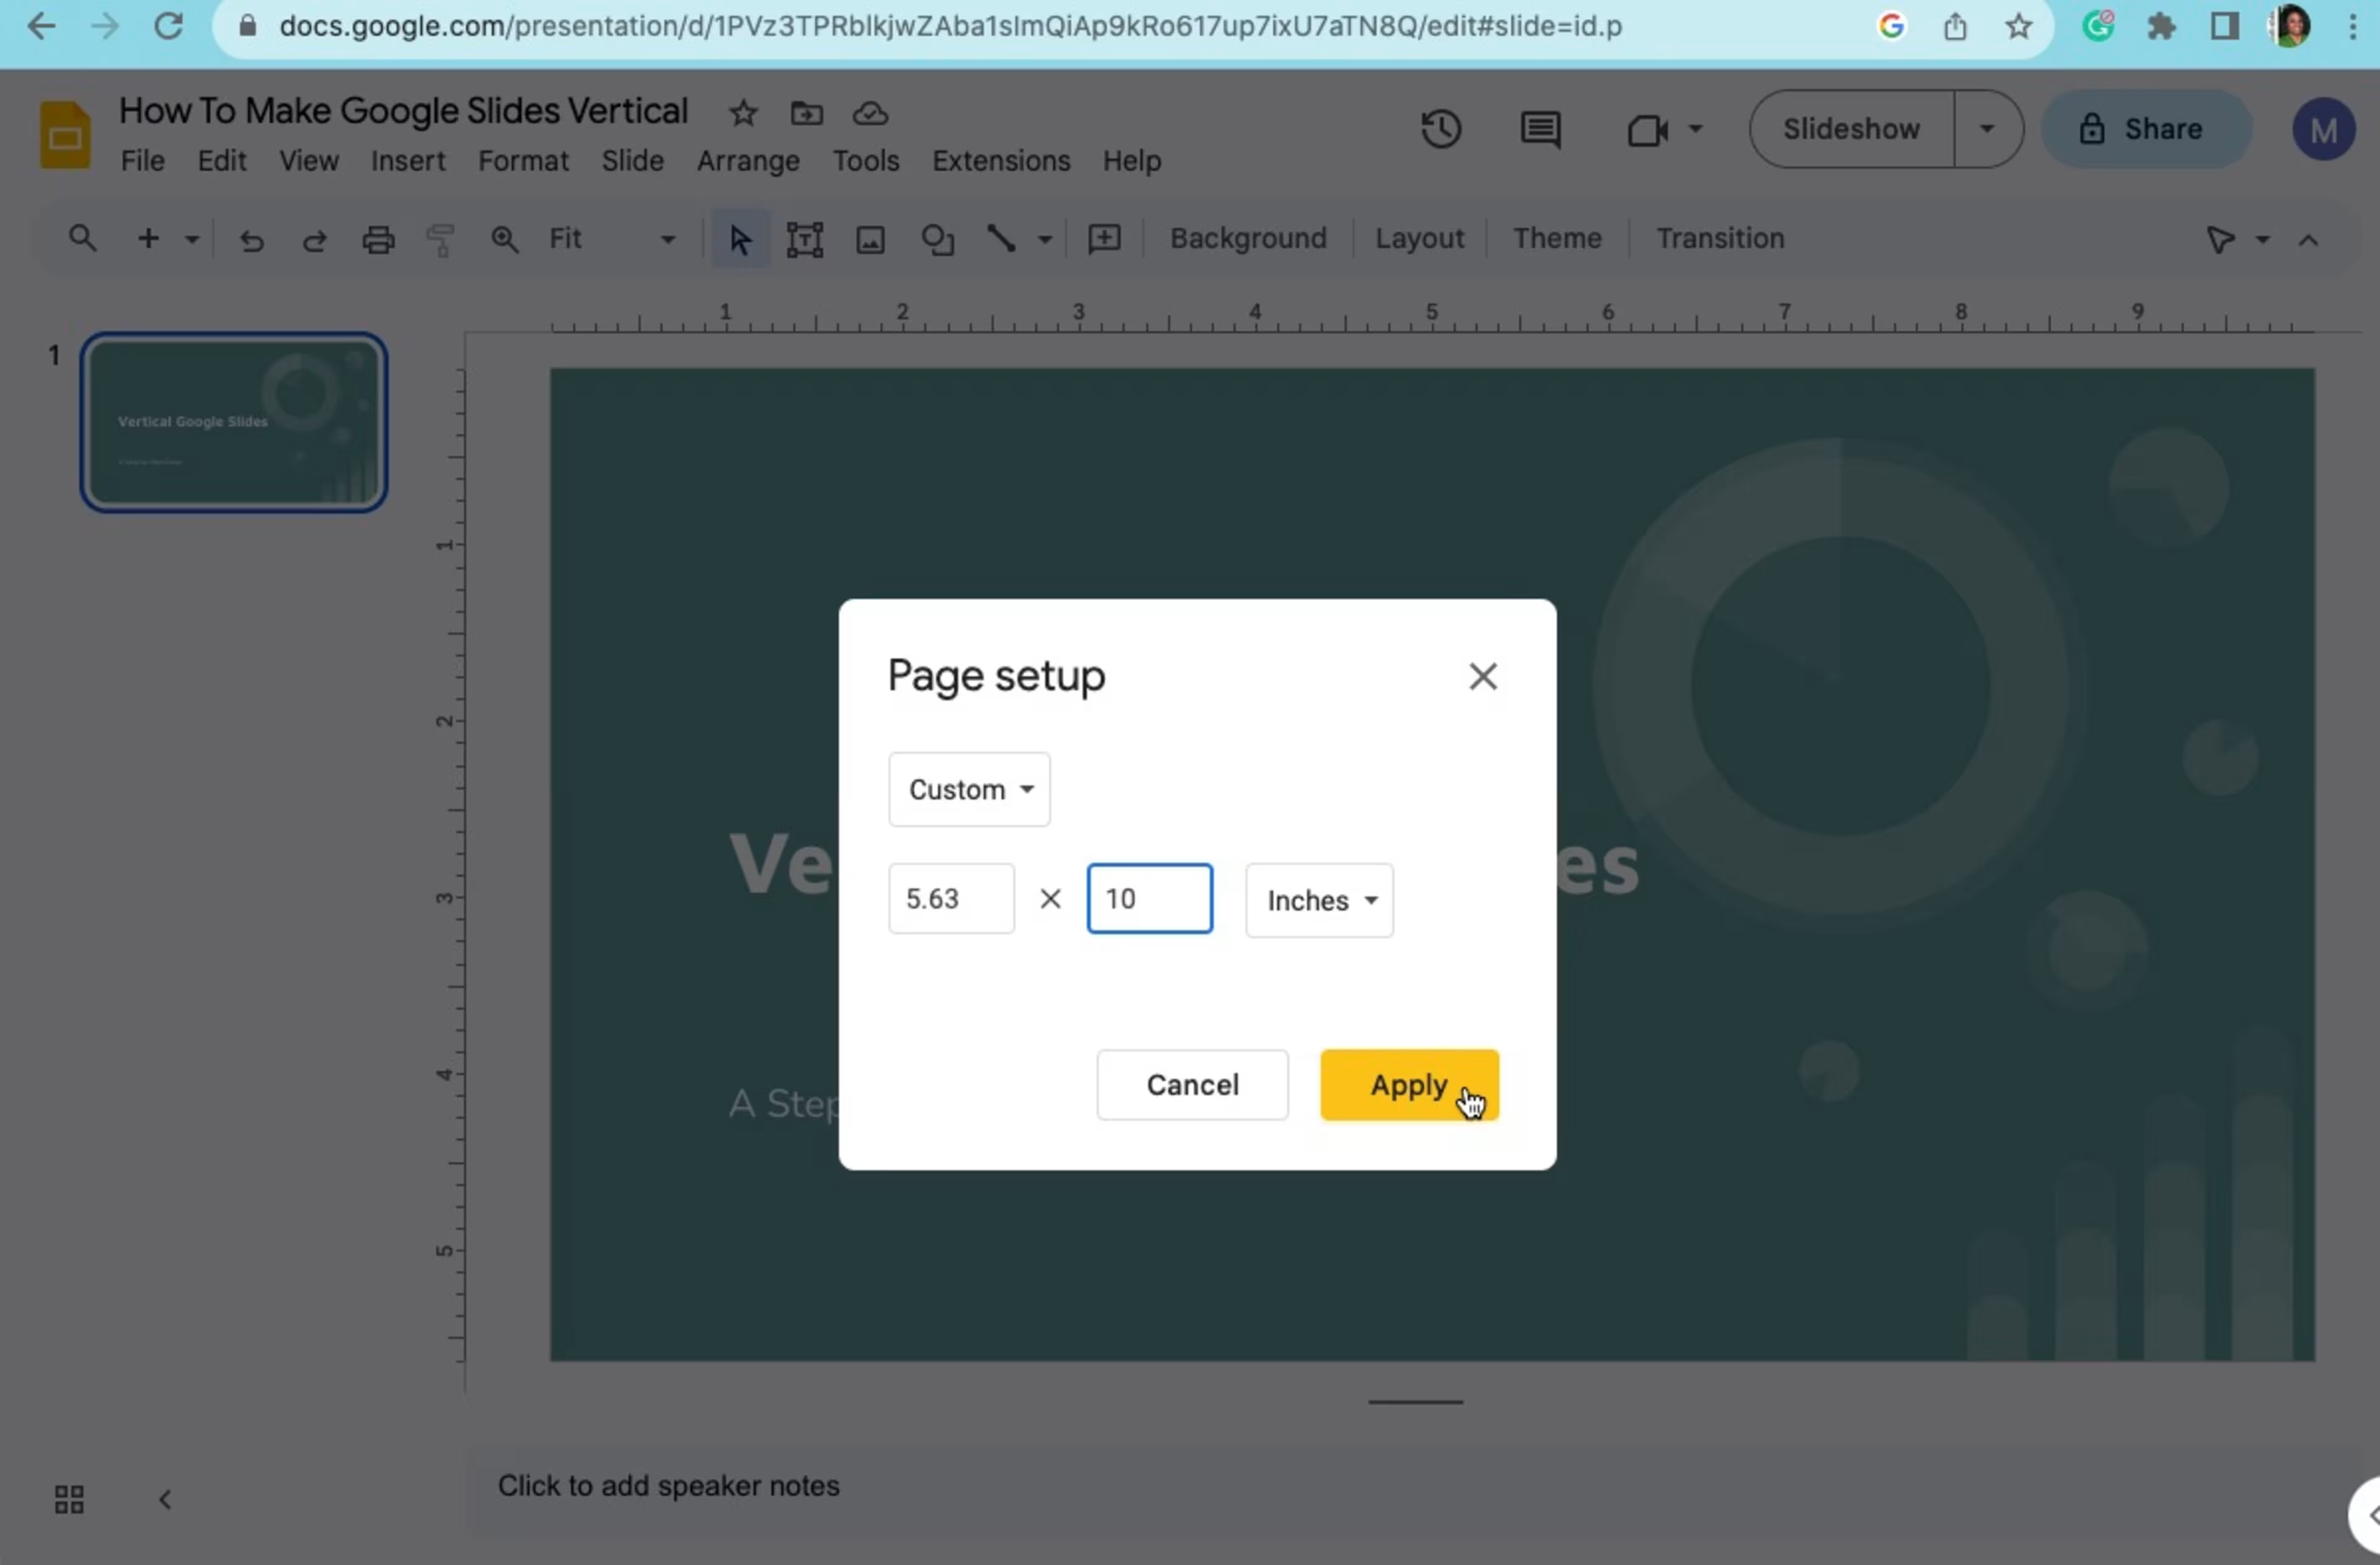
Step 5: After adjusting the width and height, click the "Apply" button to see the changes in your preview. If you're satisfied, click "OK" to confirm and save the new orientation.
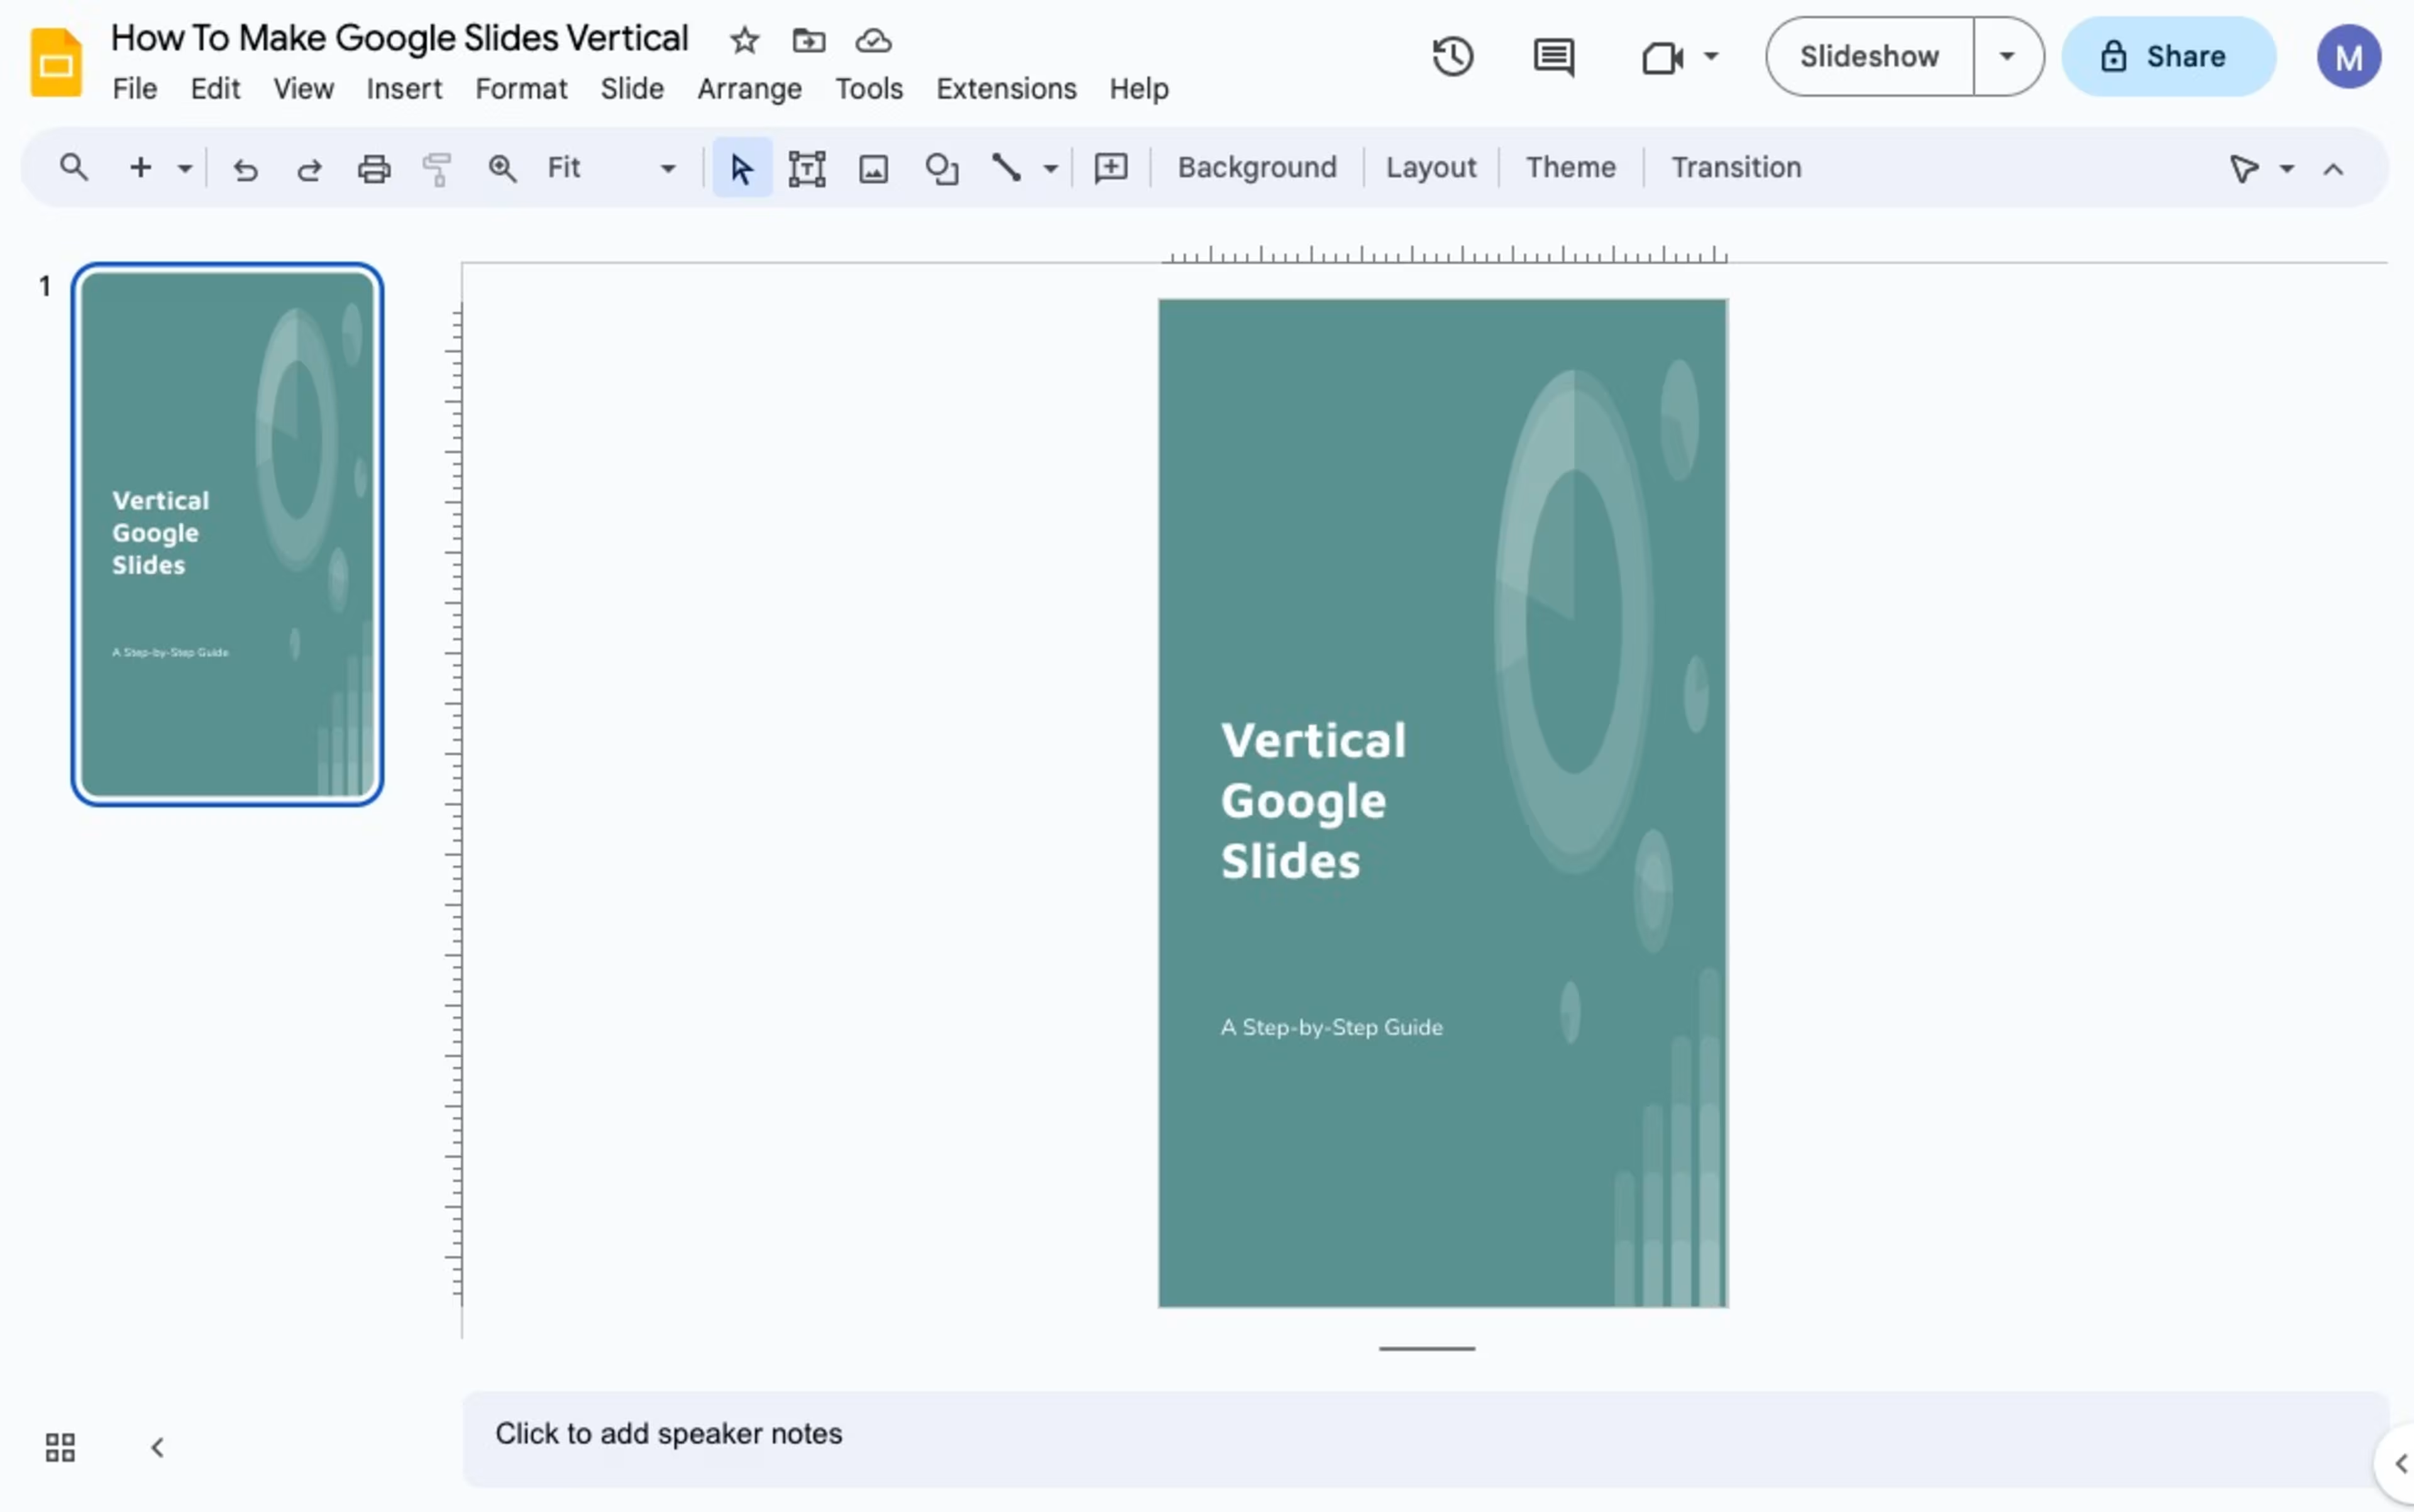
This is how to make a Google Slide vertical. Remember that adjusting the orientation might affect the layout of your content. So, be sure to review your slides and make any necessary adjustments. Next, we'll show you how to create a vertical template.
How do I create a vertical Google Slides template?
Changing Google Slides’s layout to portrait for a template involves adjusting the slide orientation and customizing the design to suit your preferences. Here are step-by-step instructions:
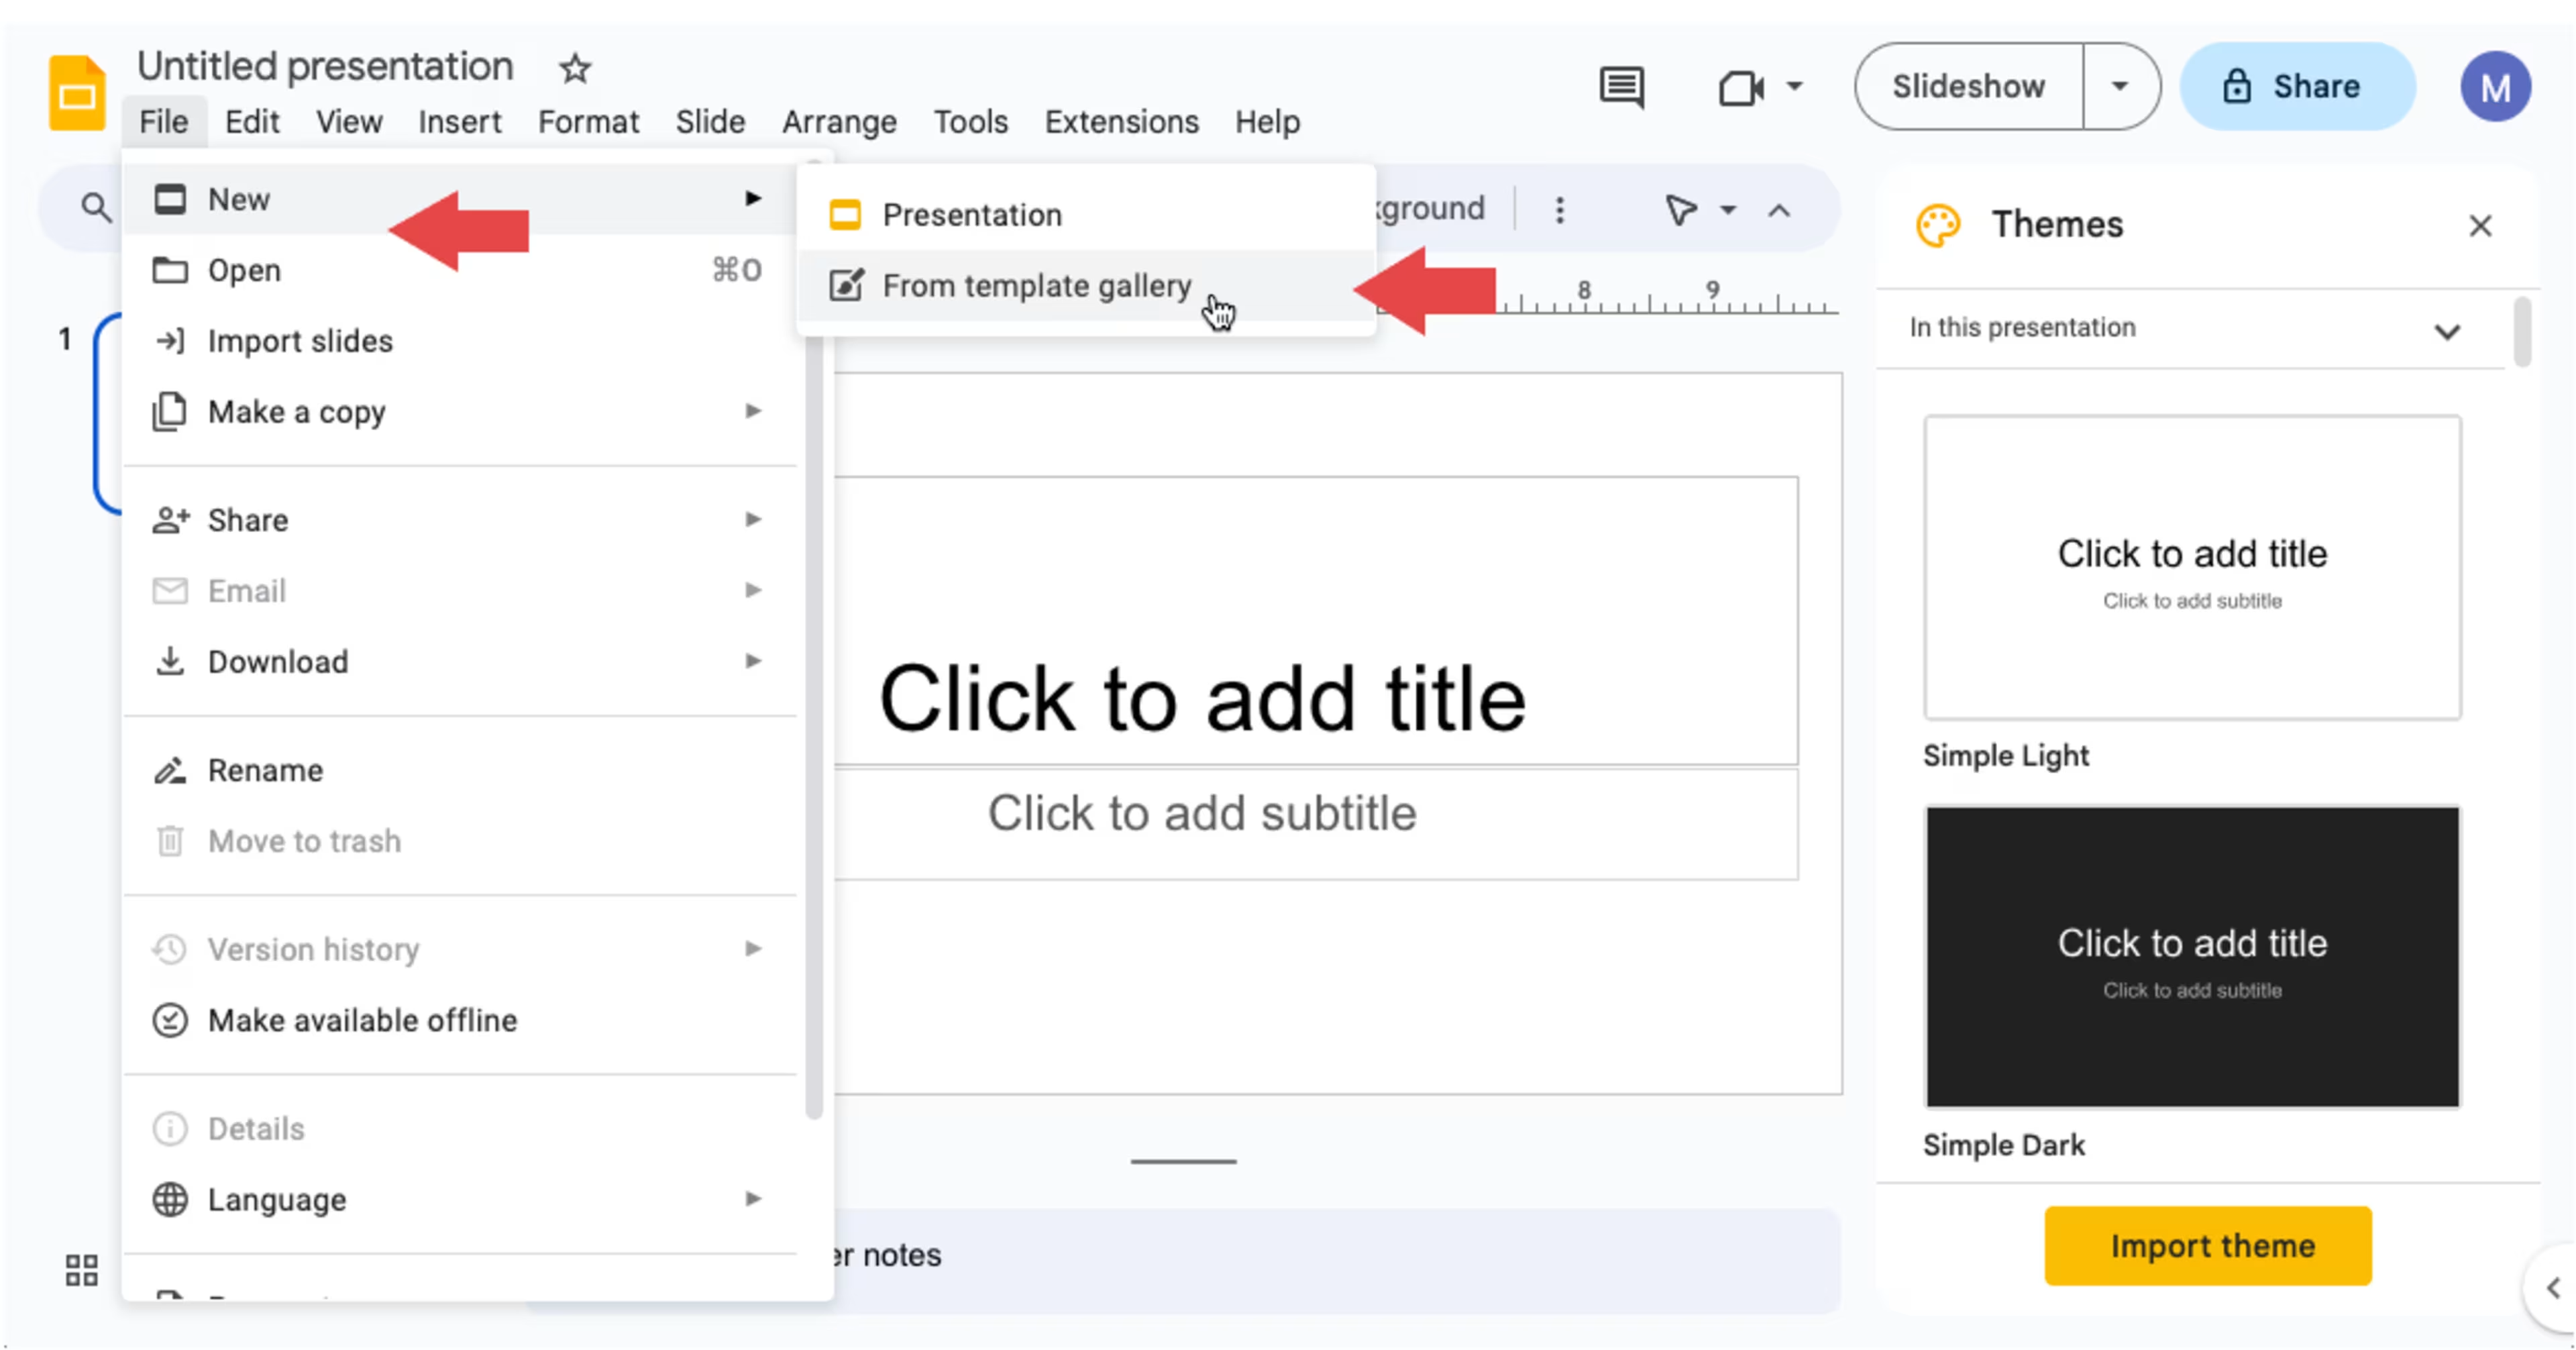
Step 1: Start by opening Google Slides to create a new presentation. Do this by selecting "File," "New," and then "From Template Gallery."
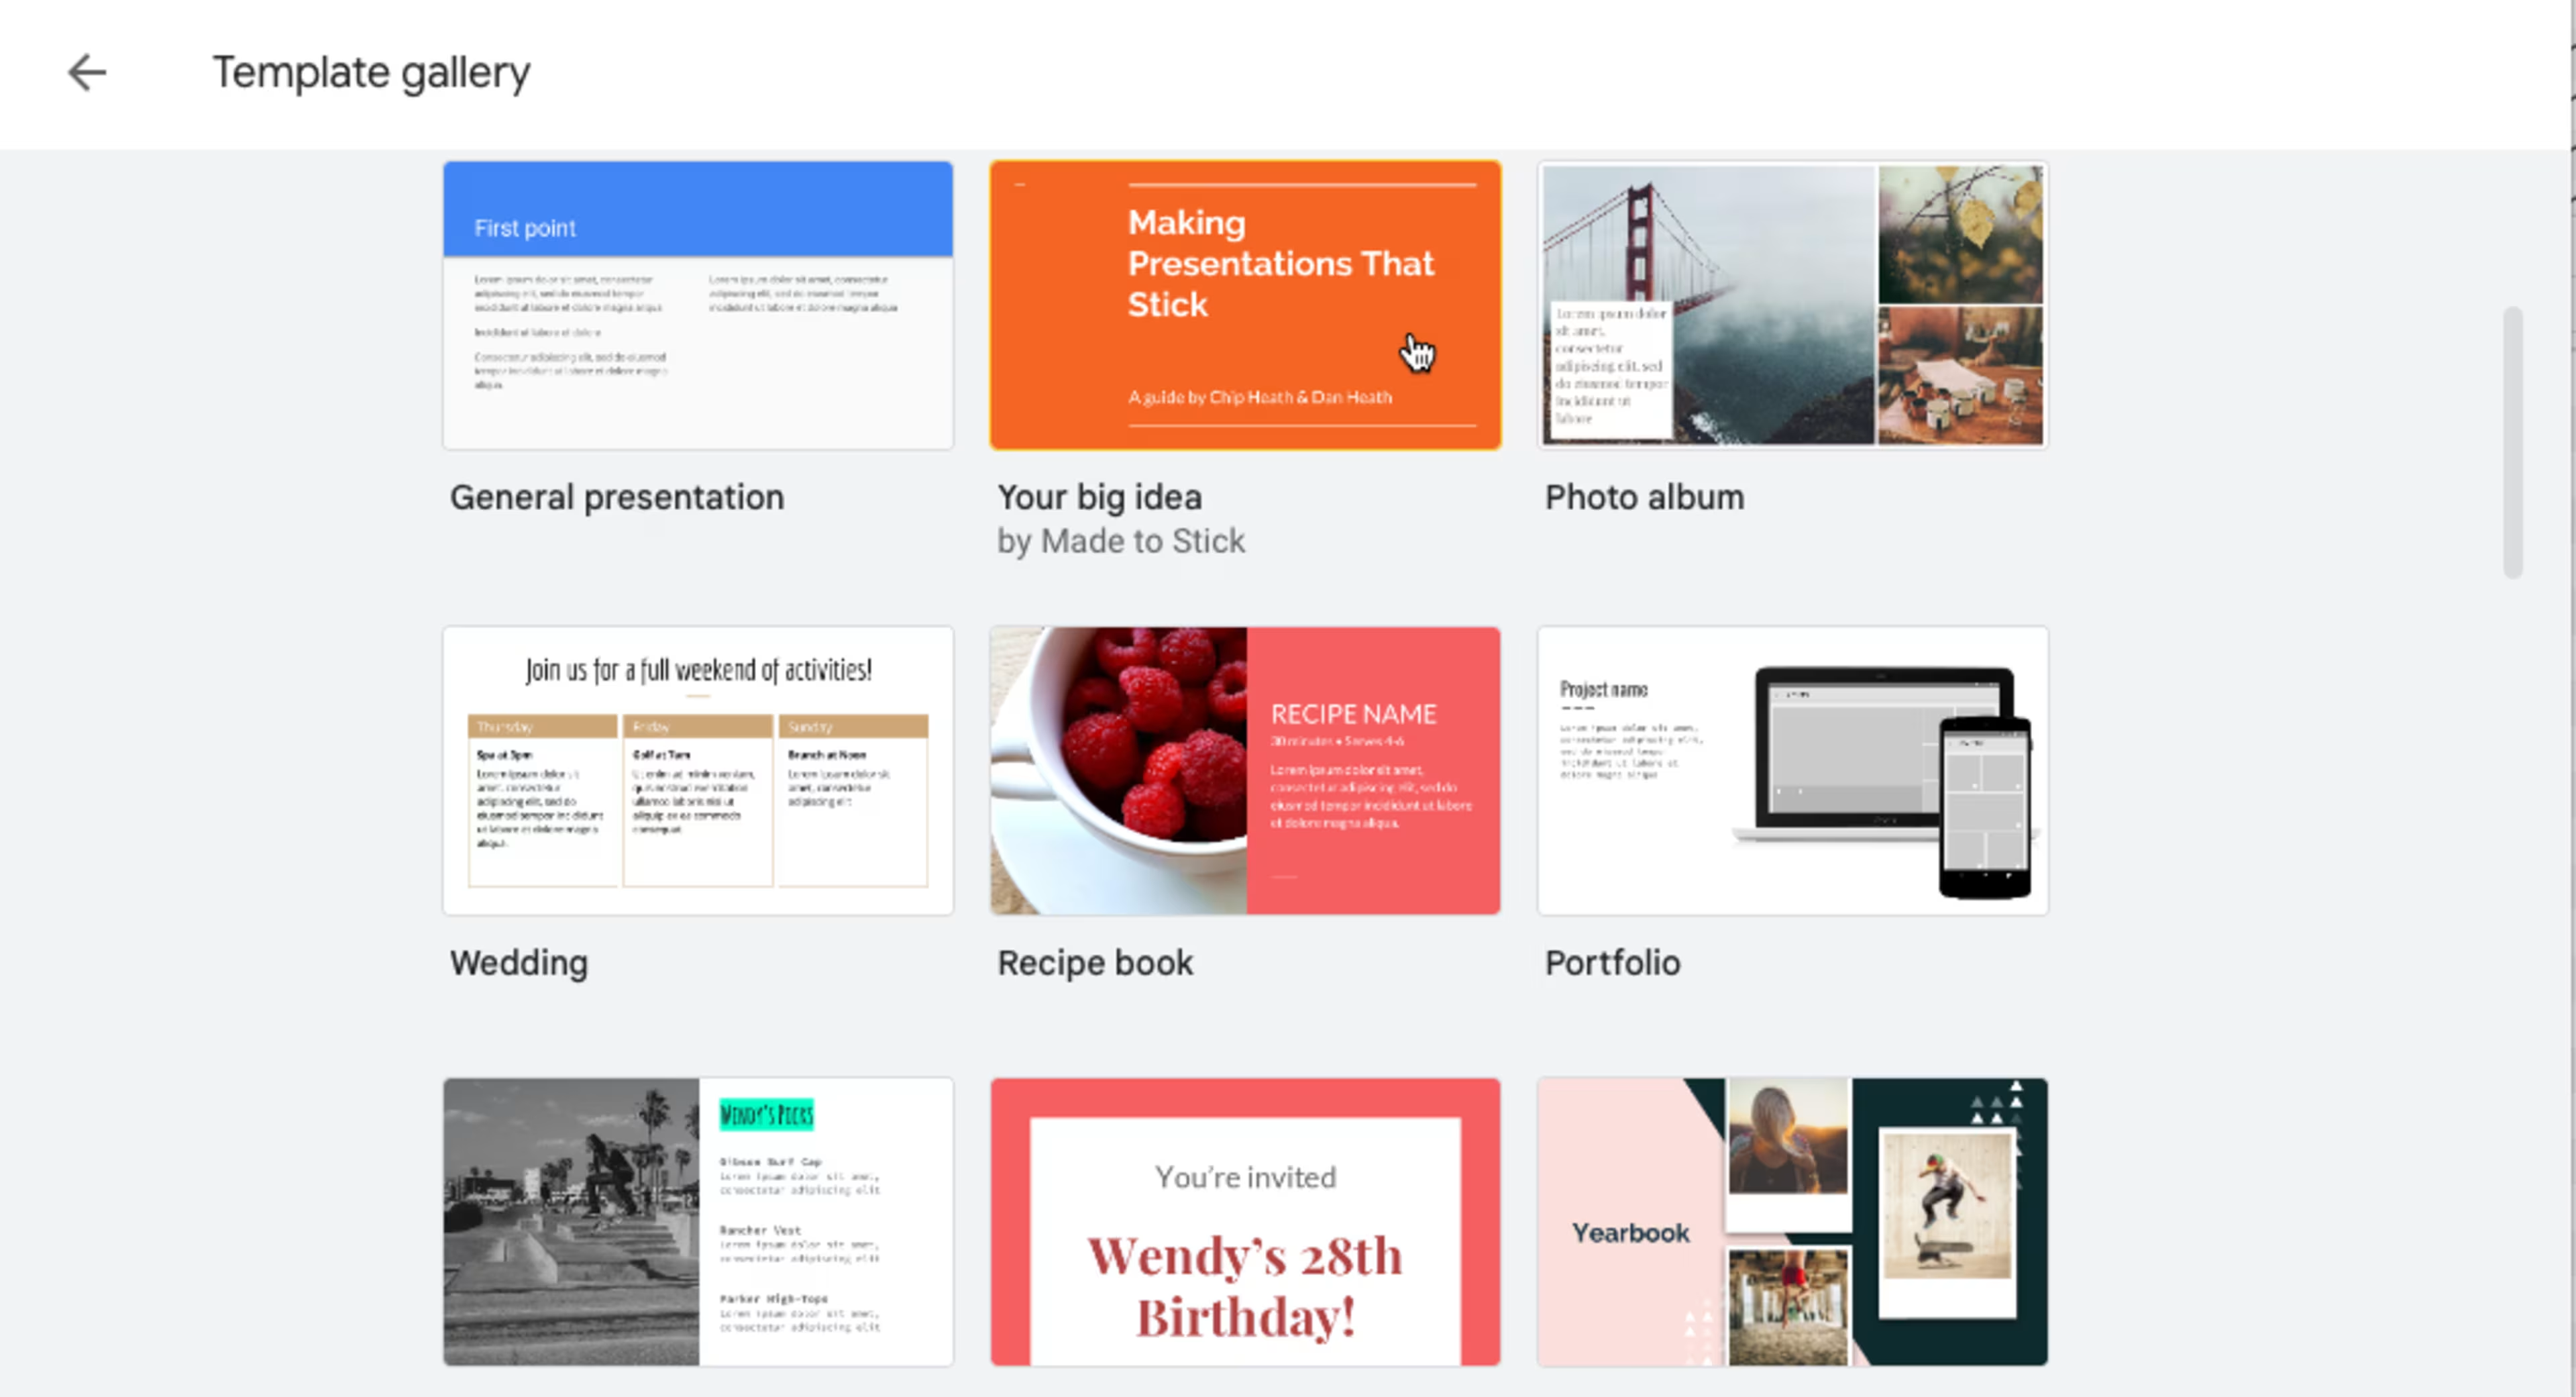
Step 2: Browse through the list of premade templates. Choose one that best matches your desired presentation style and click it to open.
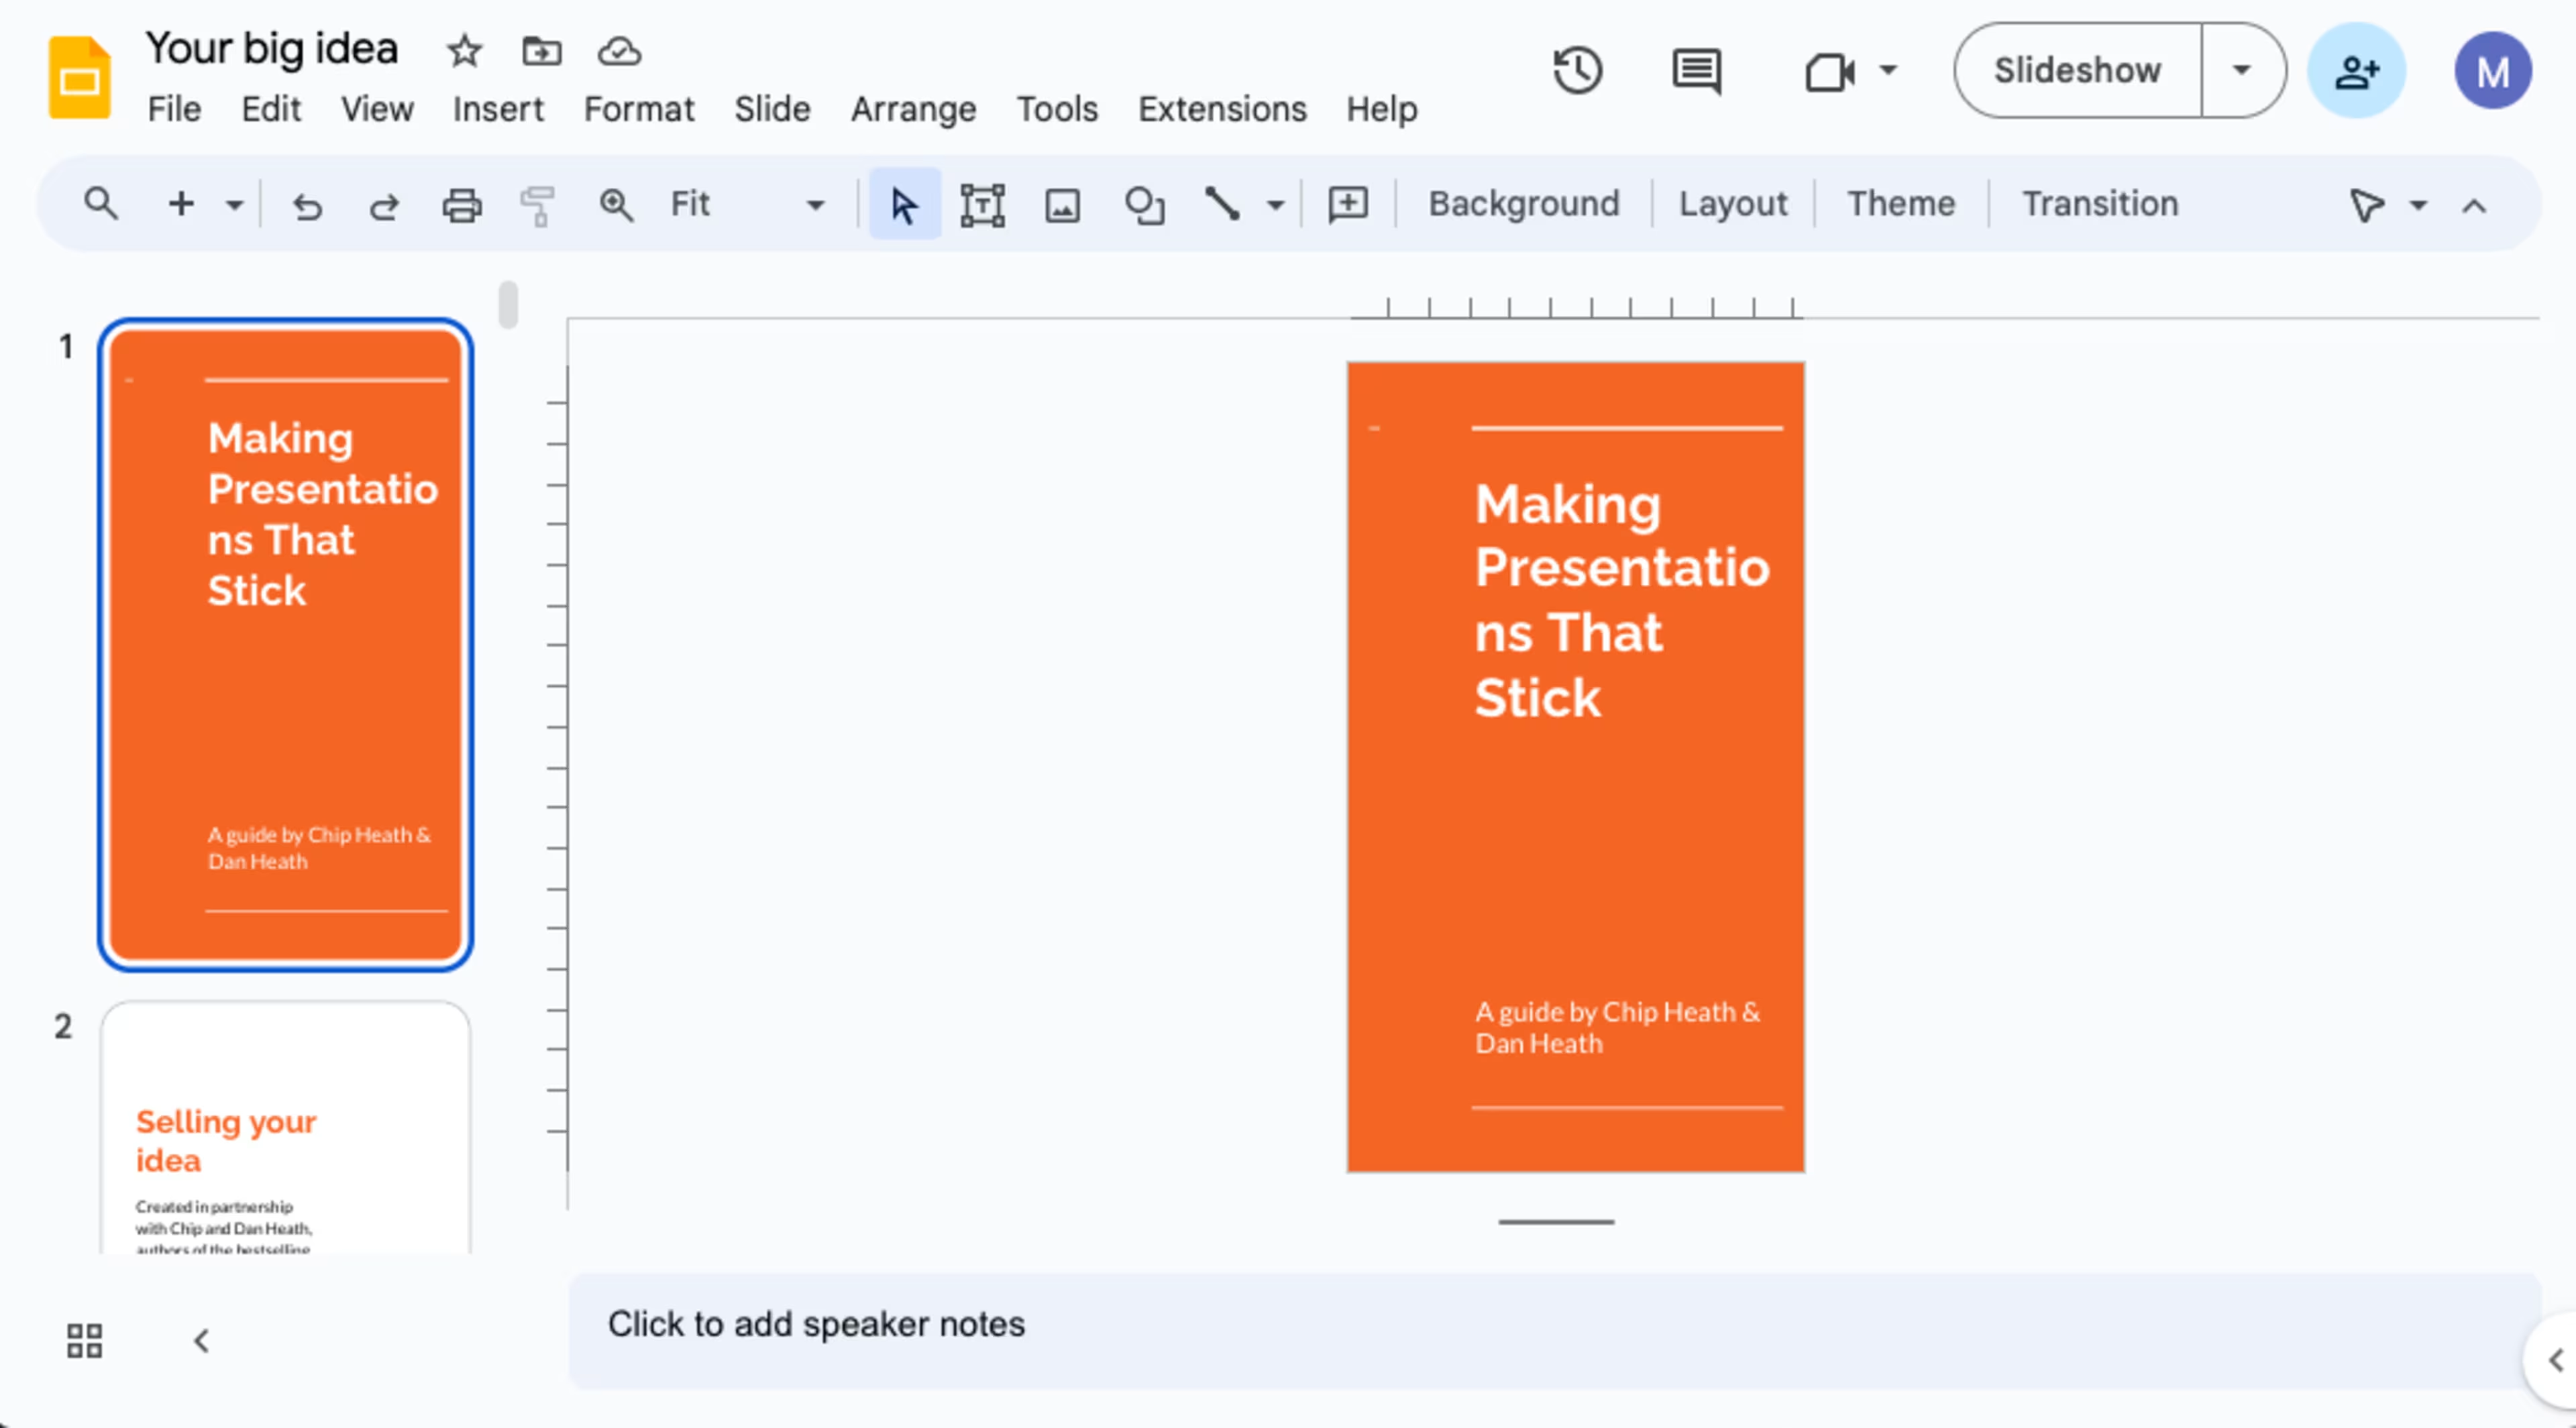
Step 3: Once you've chosen a template, follow the same steps above to make Google Slides vertical. Simply go to "File," then "Page Setup," and "Custom" to modify the width and height. Check for text boxes, images, and other elements that need adjusting to fit the new format.
Step 4: After setting the orientation to vertical, you're ready to customize the template. To do this, you'll need to click "Slide" in the top menu and then click on "Edit Theme."
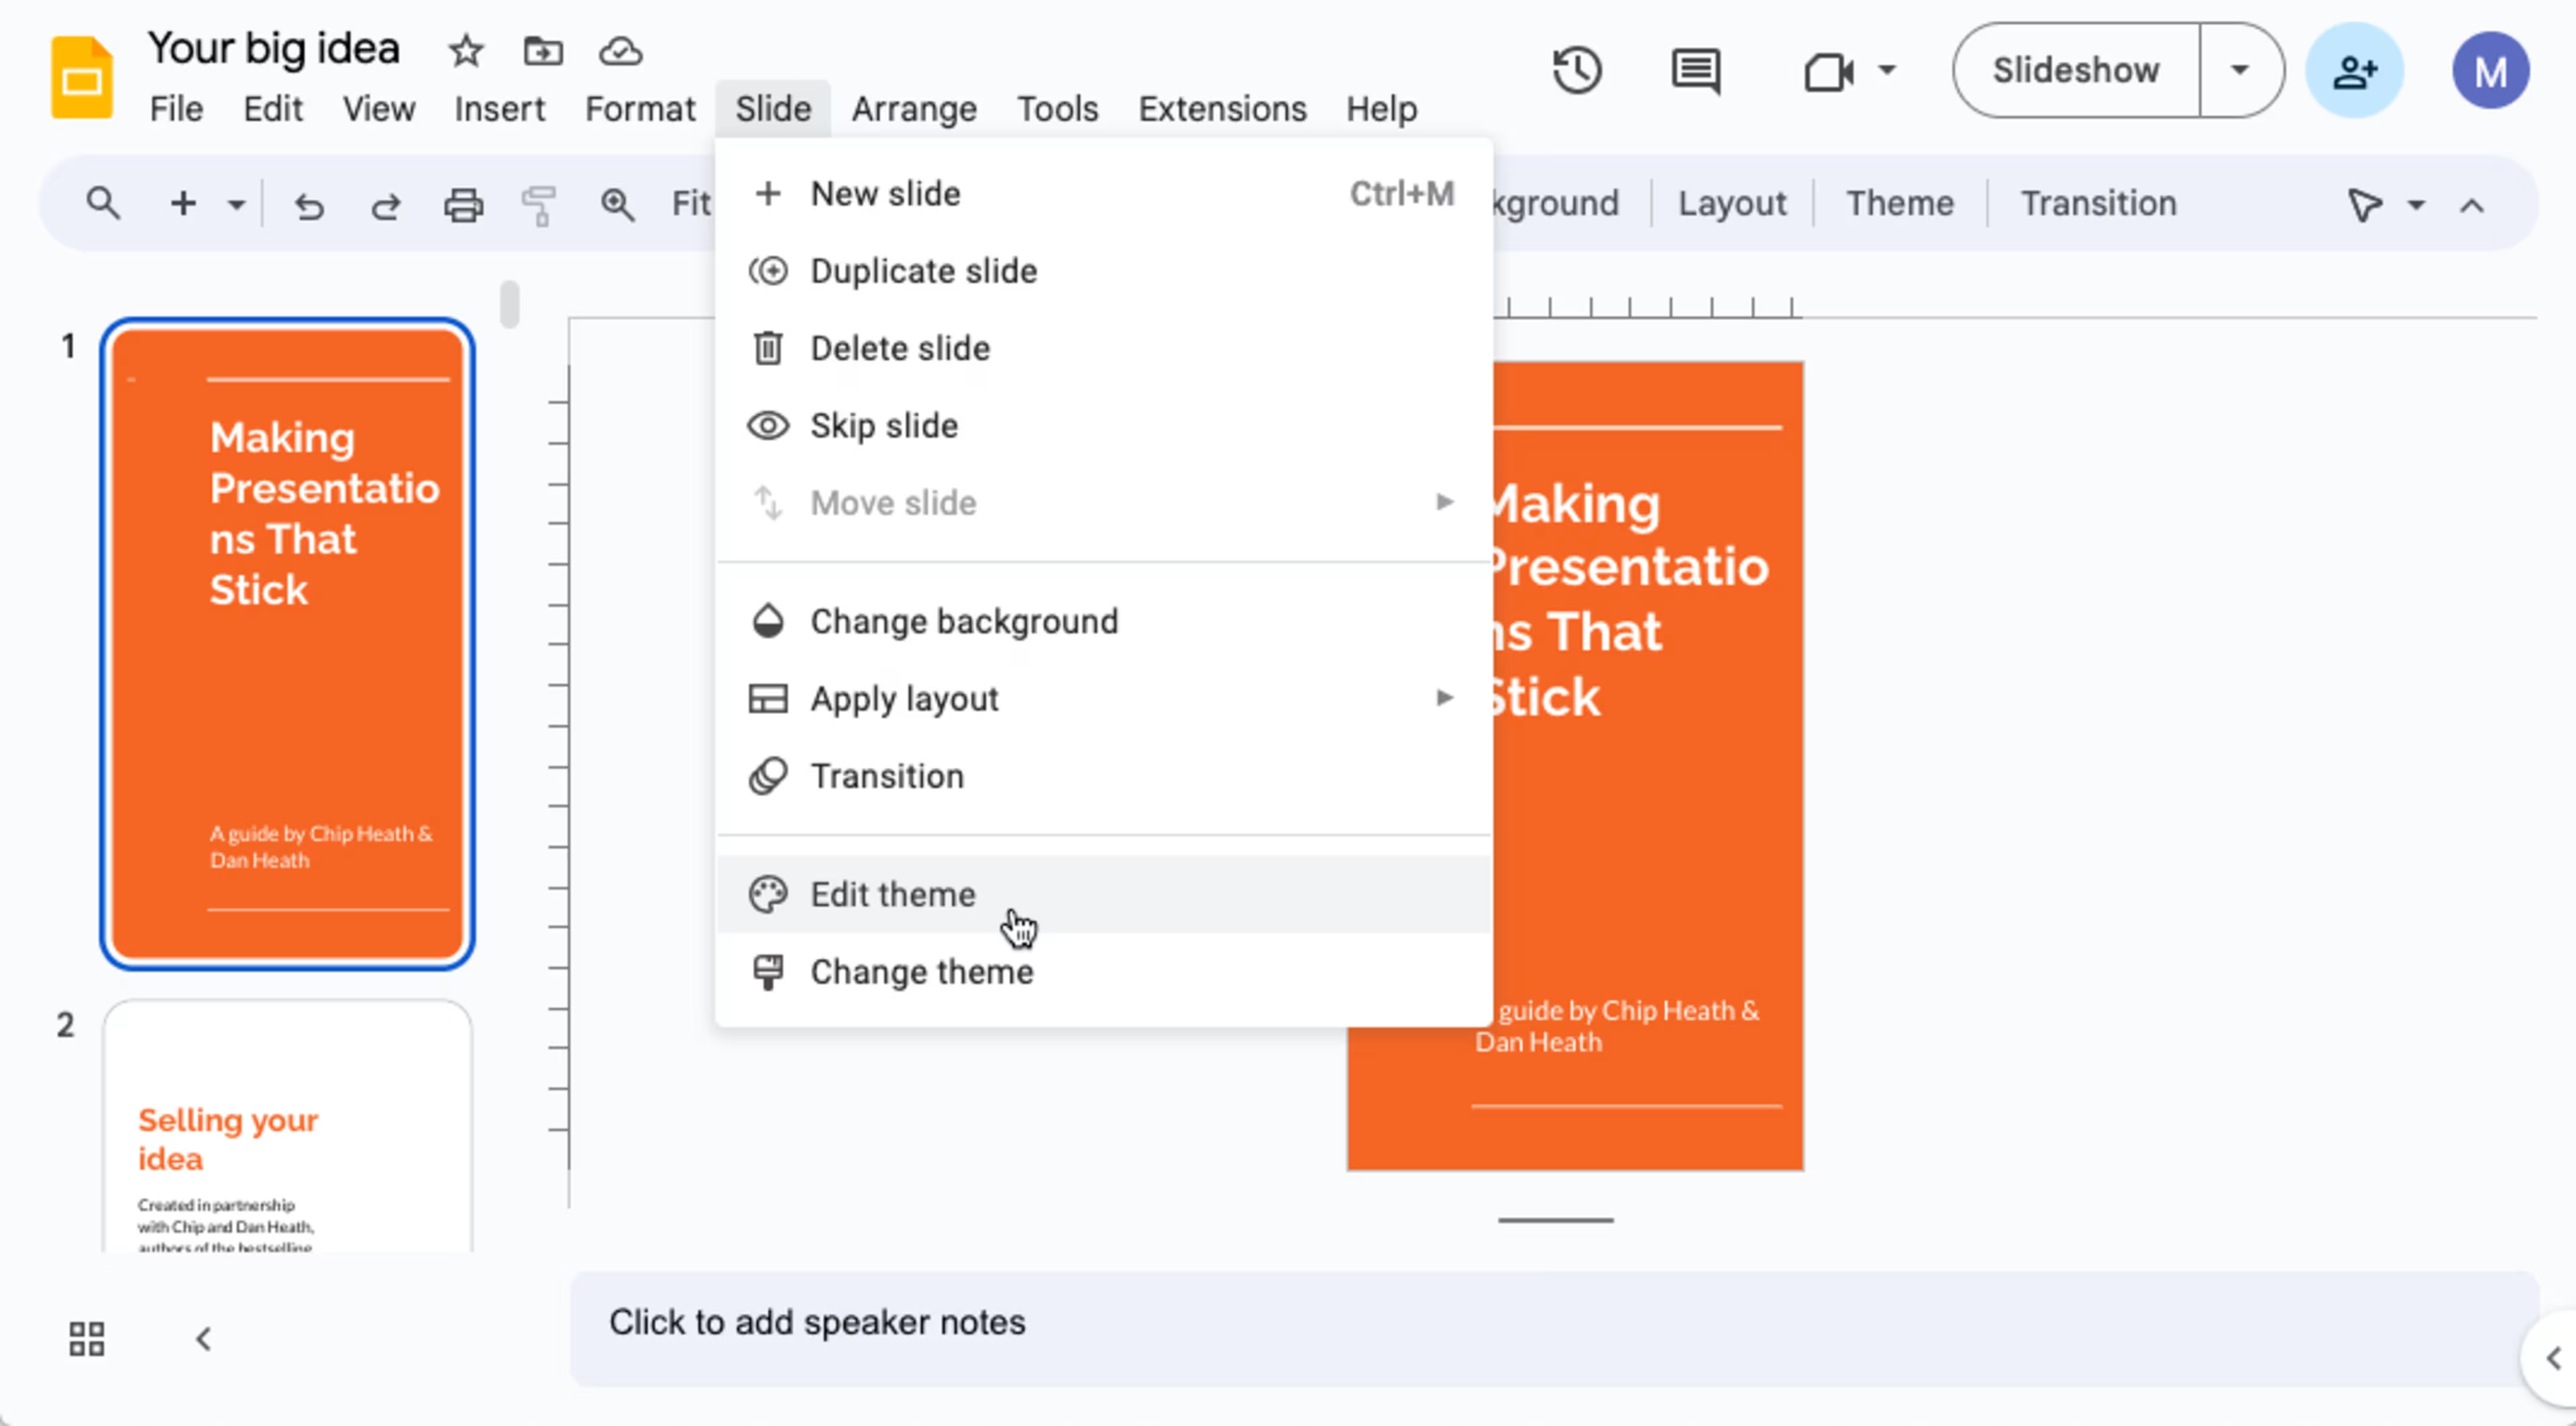
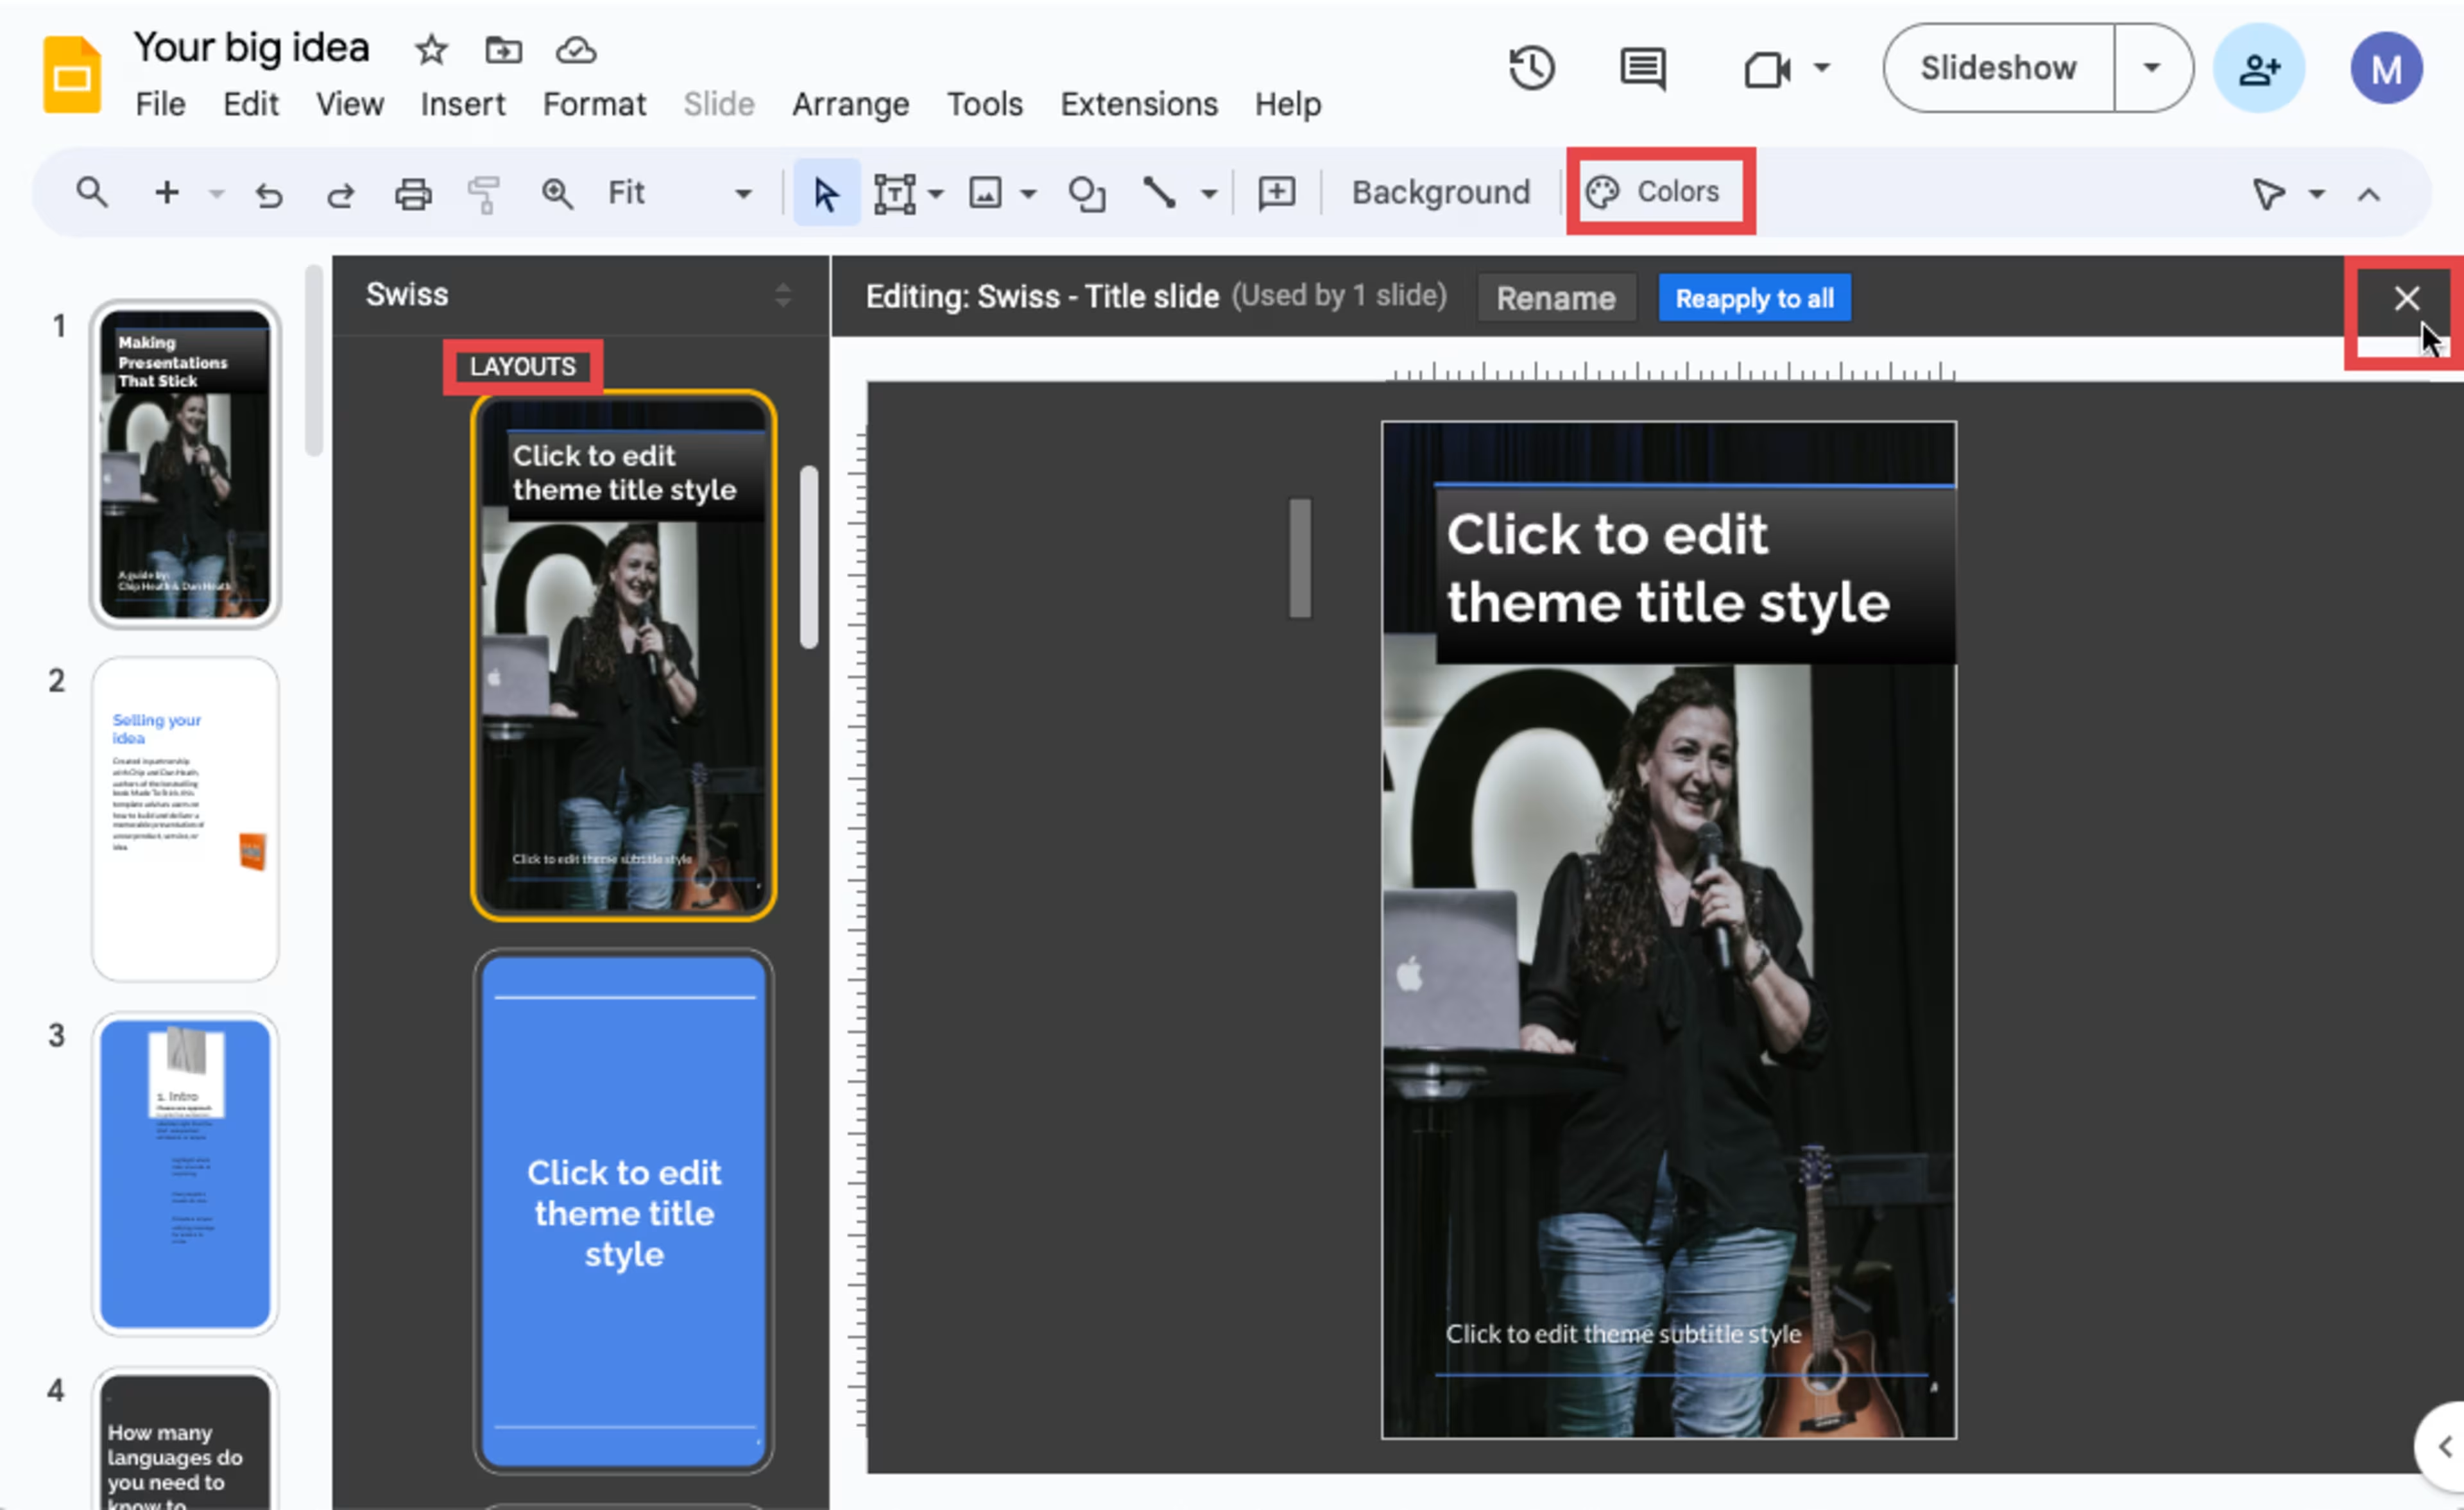
Step 5: You can customize the template with various design elements that match your preferences. You have the option of changing the entire theme, background color or background image, and the different slide layouts.
To change the background color or image, select "Background" in the menu. To change the theme colors, click "Colors" in the top menu and "Choose a Theme Color" in the right side panel. To change the slide layouts, you can access each in the left side panel. Once done, click the "X" in the top right panel to view changes on your slides.
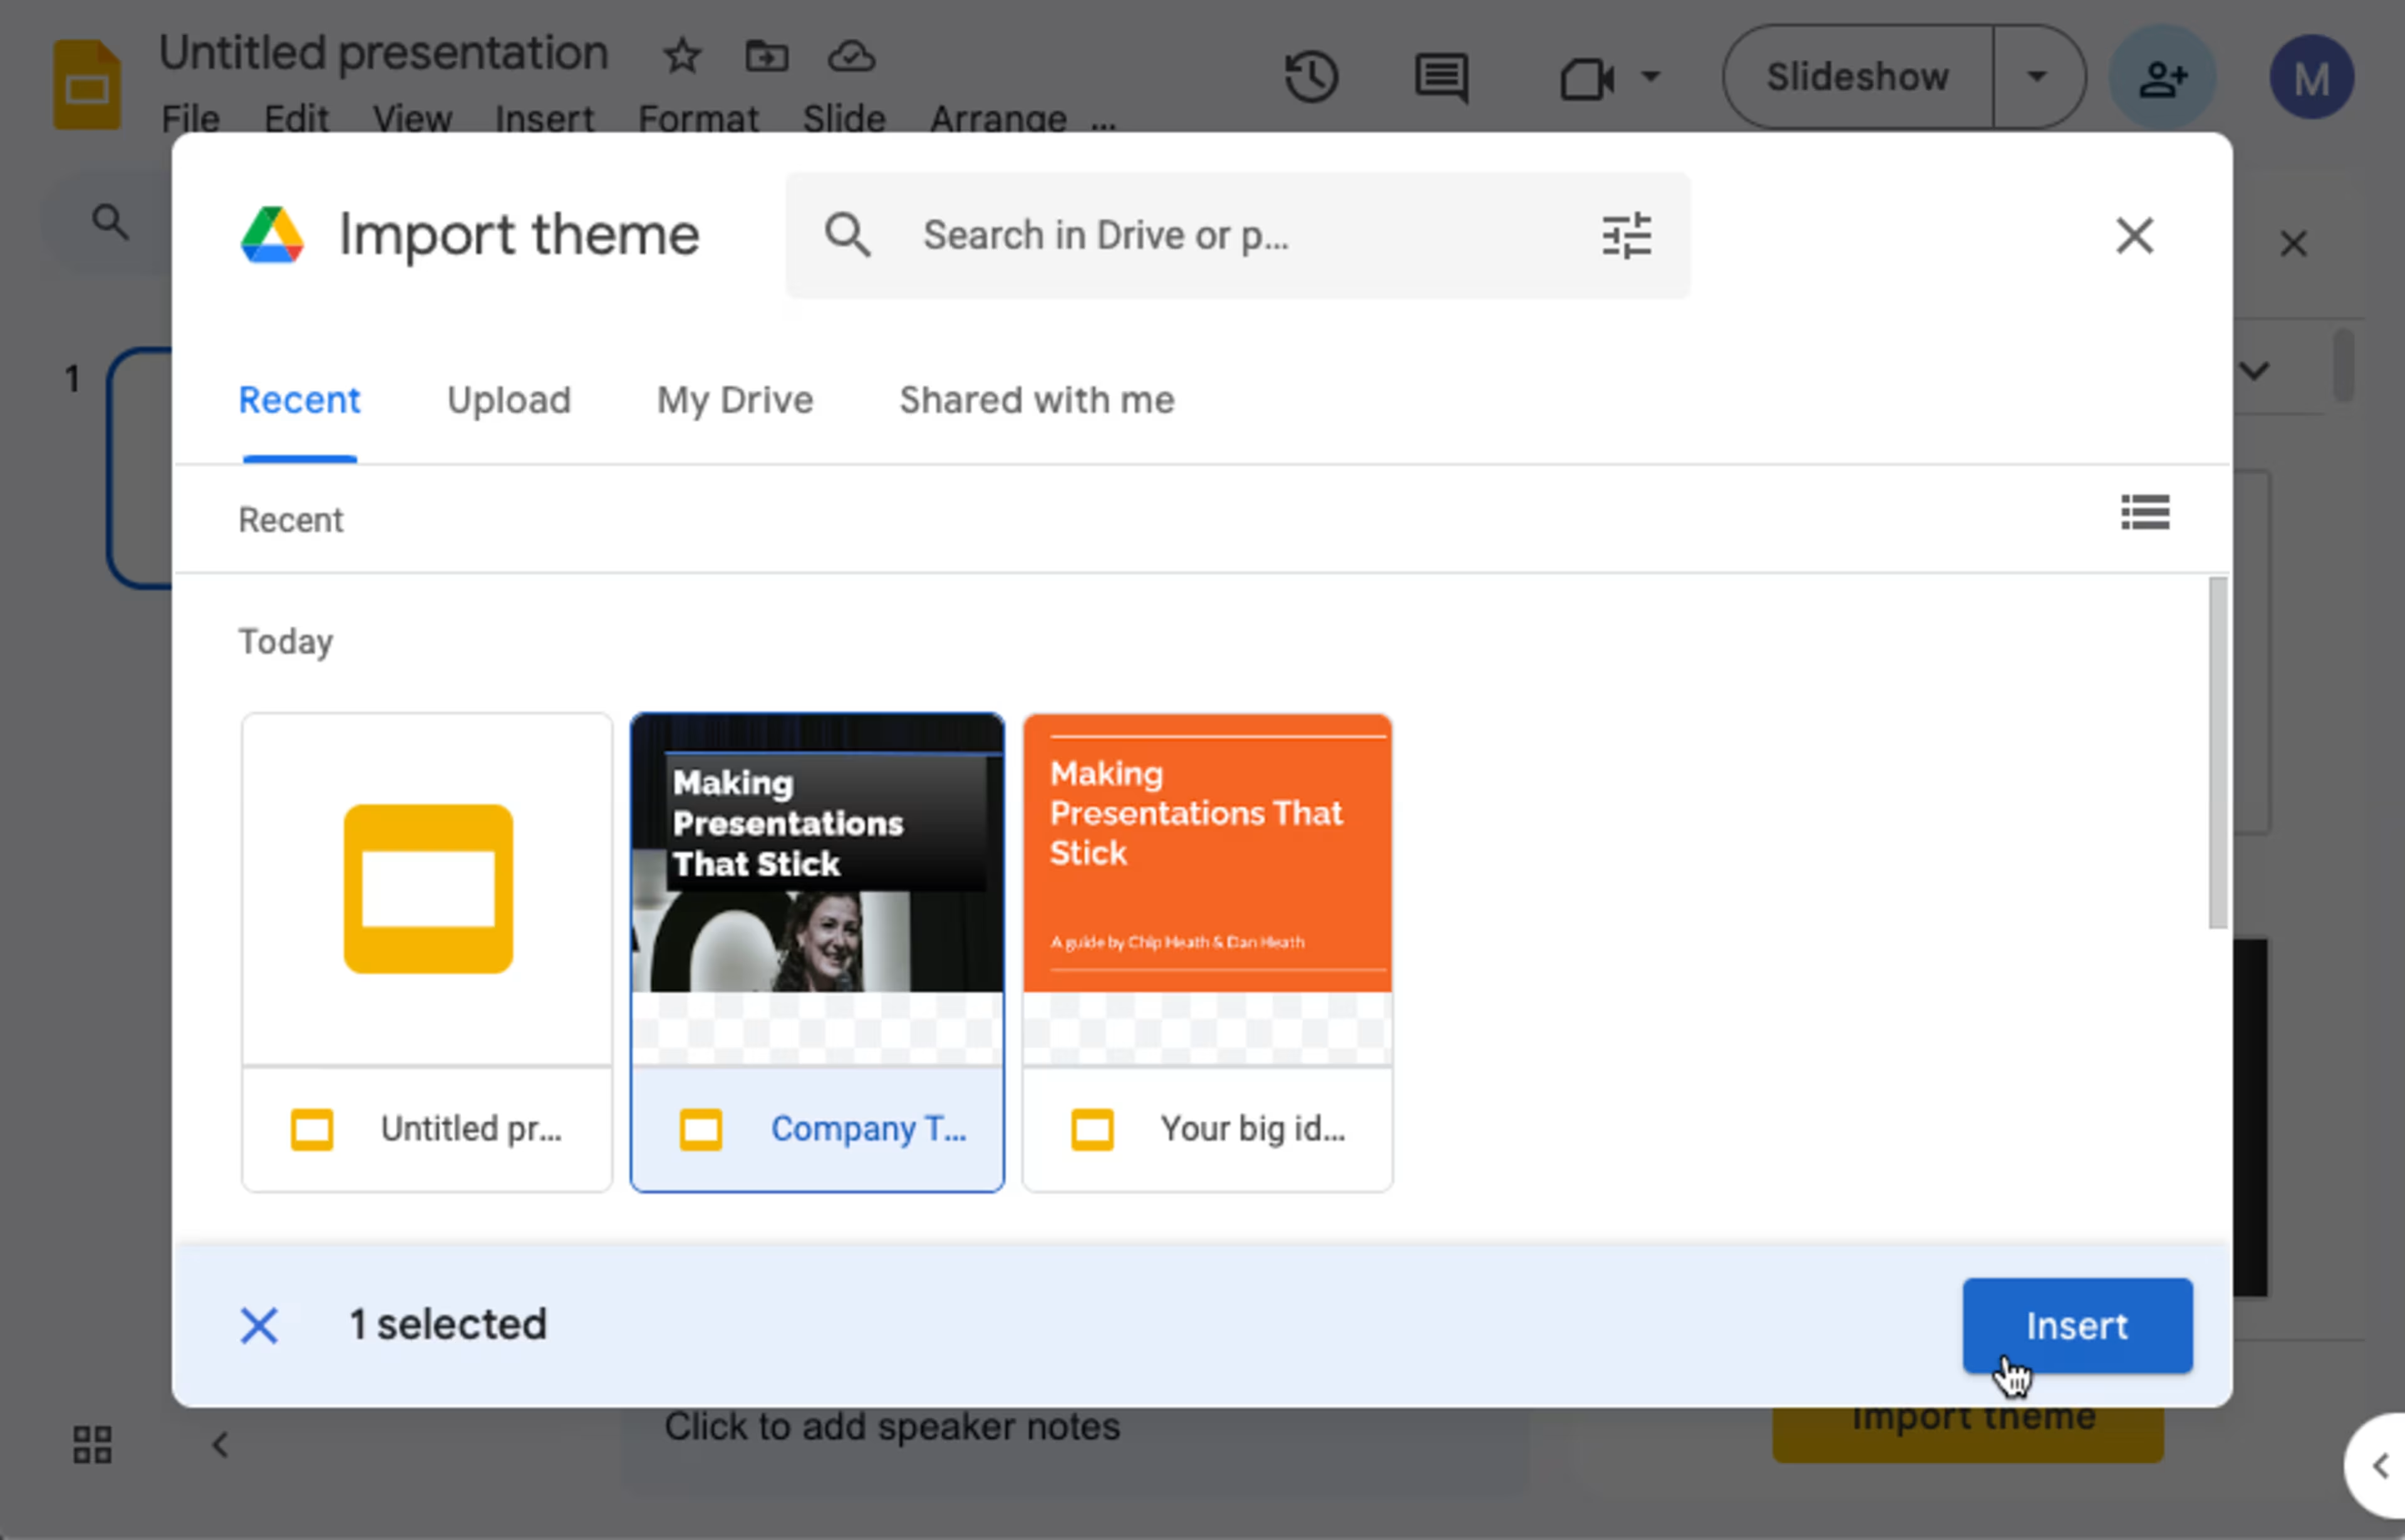
Step 6: You can use this new template for future presentations. Simply open an existing or blank presentation. Then, click on "Import Theme" in the lower right-hand panel. Click on your template and then click "Insert" to import it.
What are some tips and tricks for creating vertical Google Slides presentations?
Working with vertical Google Slides presentations can be a bit tricky as compared to traditional horizontal slides. Consider the following tips and tricks:
Map it out before designing the slides. That way, you ensure your presentation aligns with your goals, message, and audience.
Focus on the layout. Your Google Slides may have attractive colors and fonts, but the layout is what really matters most. Check your margins and the alignment of all elements to ensure a good balance of text, graphics, and white space.
Use vertical images and graphics. In many cases, horizontal images may not work well. Your images should provide context to your content rather than merely make it look attractive.
Break up the layout. Since your slides will be in a vertical format, it helps to break them into parts. You could split the slides in half so that the titles and text are at the top and the images are at the bottom. You could also split the slides into thirds.
Use fonts and colors that stand out. Vertical slides give you an advantage by looking different from most other presentations. You can also make your presentation memorable by using large fonts and bold colors that stand out.
Test your presentation before sharing. Creating your slides in portrait view makes them user-friendly for mobile devices. After you've designed your Google Slide presentation, test how it displays on smartphones, tablets, and other devices.
How do I print Google Slides in vertical orientation?
You can print vertical slide presentations easily. Just make sure your printer specifications are set to "portrait orientation." Otherwise, your slide content will be cut off, and you'll waste paper and ink doing a reprint.
Here are the steps to print your vertical slides:
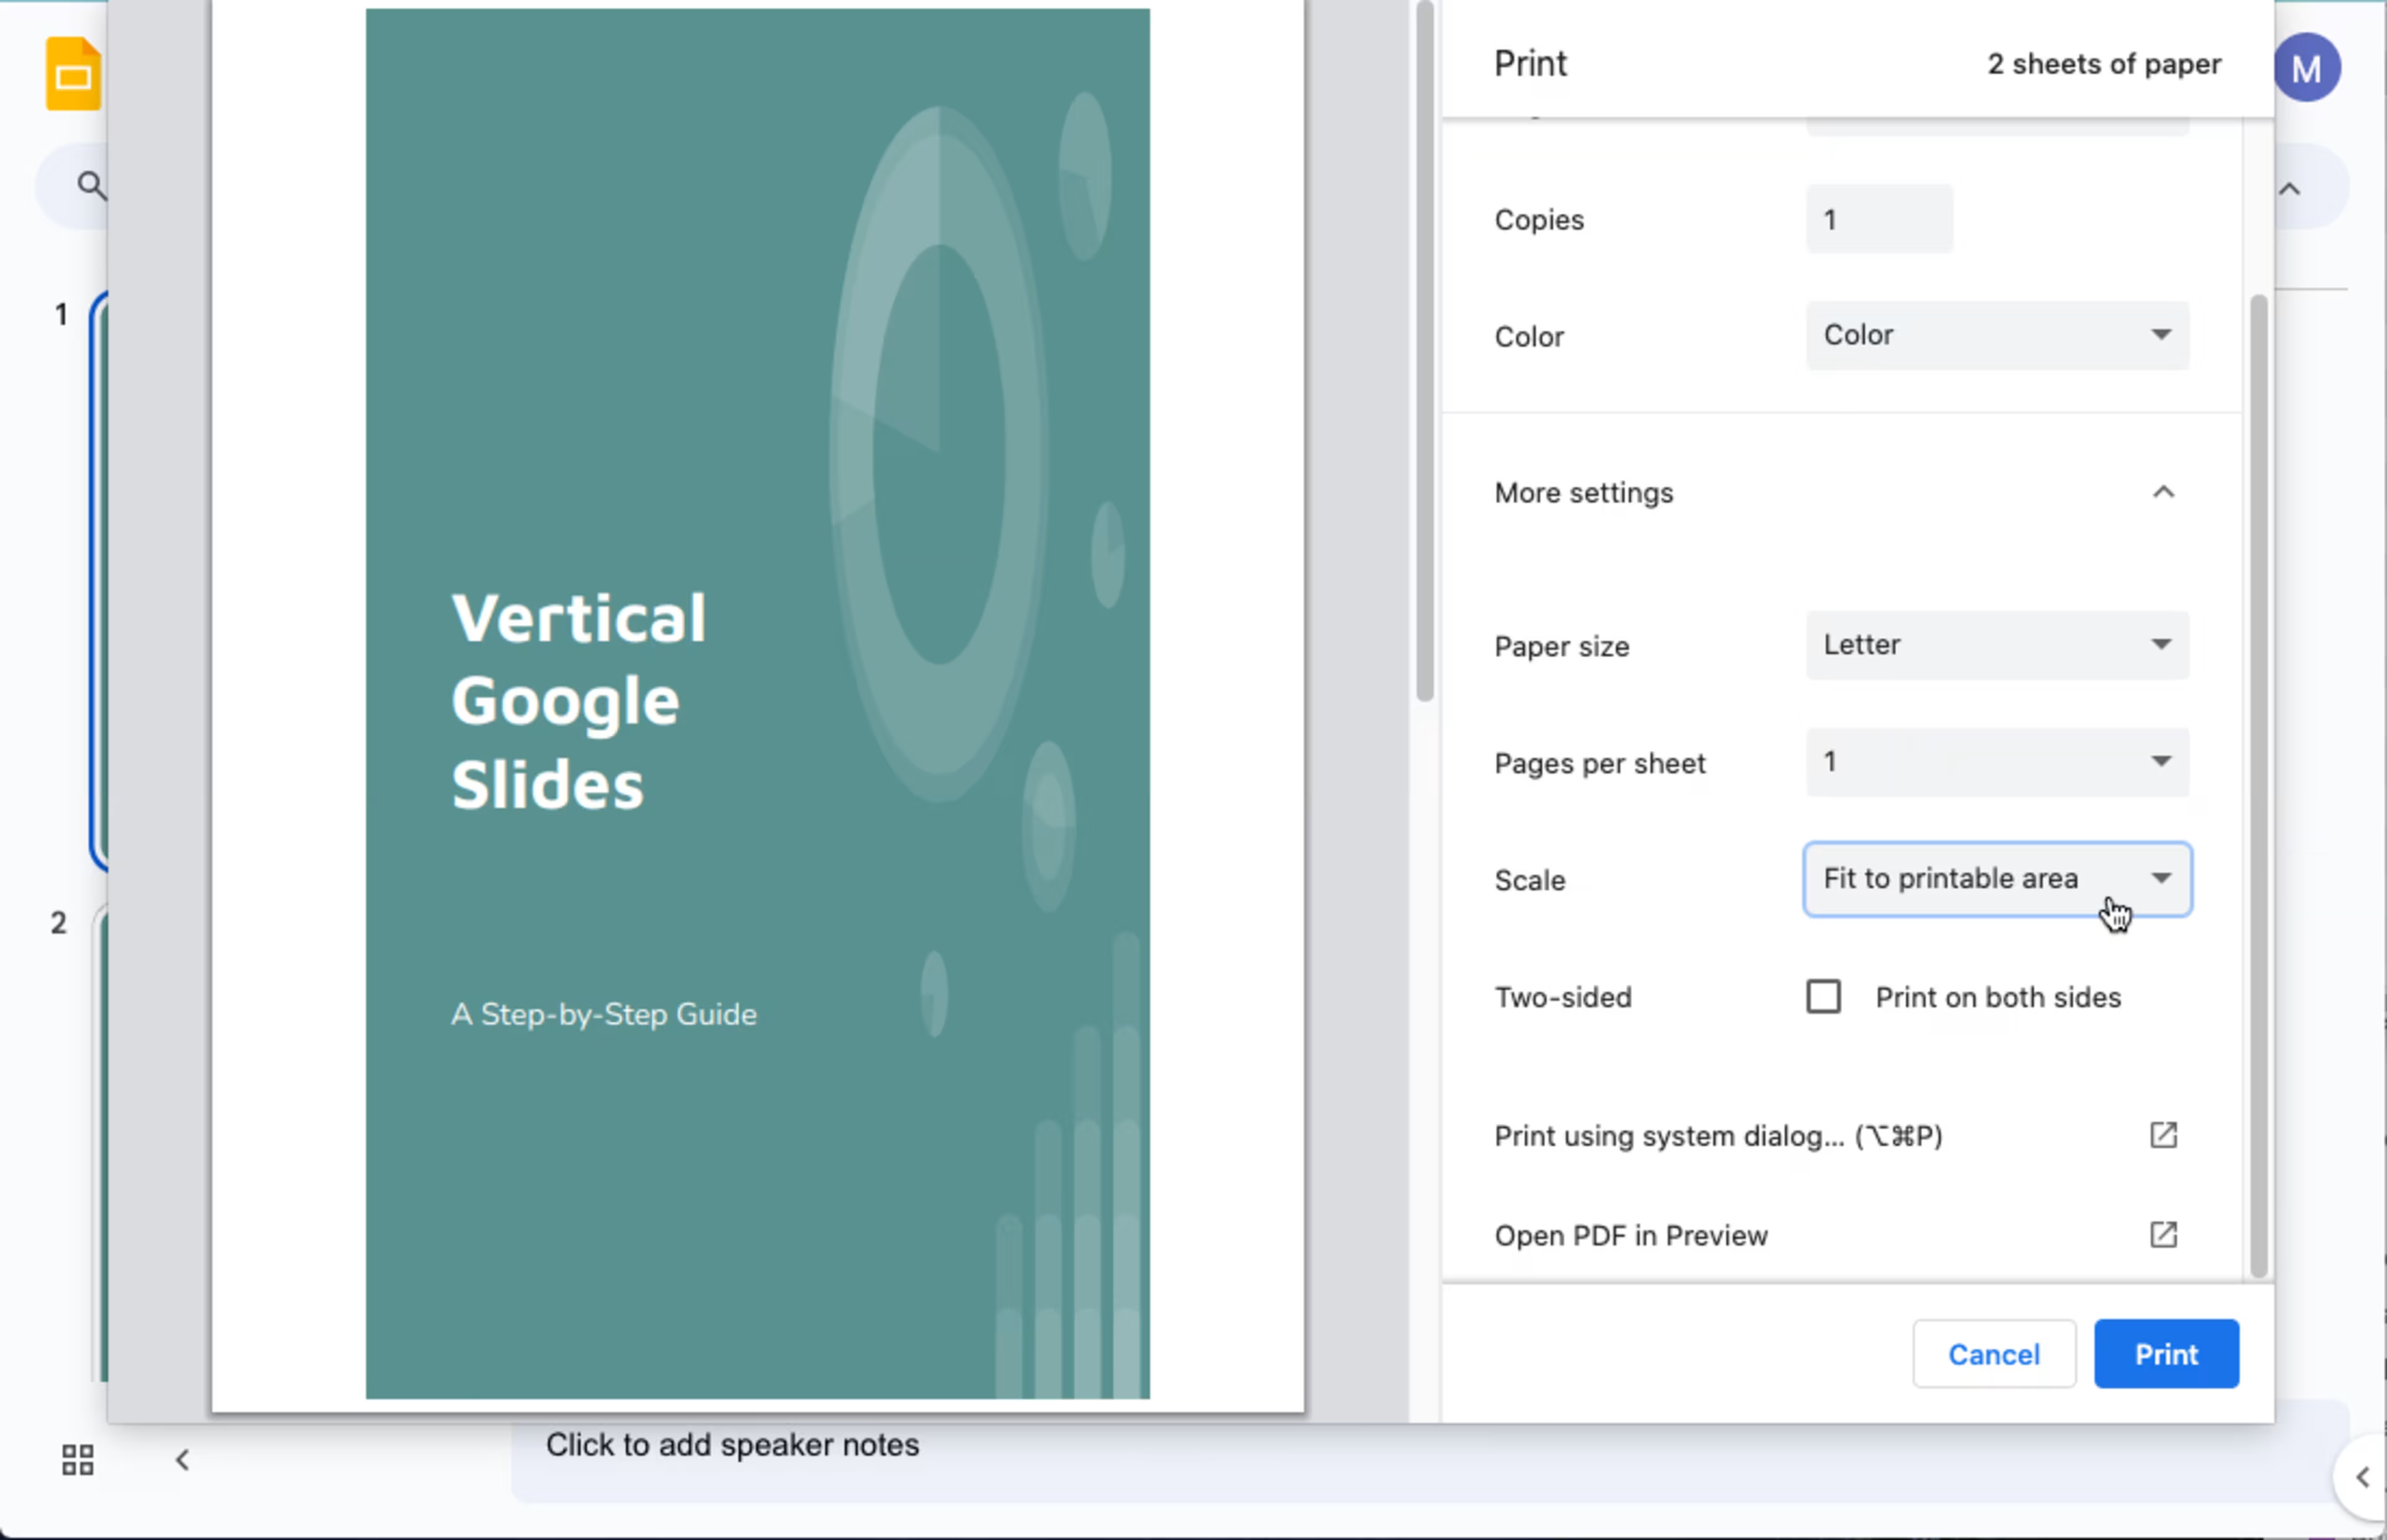
Step 1: Click the printer icon.
Step 2: Change your printer settings to your desired output. This includes the number of copies, color vs. grayscale, scale, etc., depending on the type of printer you have. You can also preview the slides to make sure everything looks okay. When satisfied, click "Print."
What are some common mistakes to avoid when creating vertical Google Slides presentations?
Most people create and present Google Slides shows using the horizontal orientation. That's the default setting. However, those who decide a vertical orientation works better for their presentation often make the following mistakes:
Distorted images. If the original presentation or template contains horizontal images, some of your images will look stretched or compressed when converted to a vertical orientation. This happens especially to background images or those that take up quite a bit of the slide's surface. Be sure to check each image and crop or resize accordingly.
Misaligned elements. Going vertical can also cause the elements not to align properly. Text within the text boxes may not have enough room to flow correctly. Graphics may be positioned so that there's too much white space. Check each slide to ensure everything lines up as desired.
Overcrowded text. Trying to jam as much small text as possible on a slide is common. However, in vertical format, too much text can be challenging to follow. Use a readable font size of about 24 points or larger so the audience doesn't have to strain their eyes to read it. Make use of bullets and lists.
Compare the best presentation software
By following these steps, you'll better understand how to make a slide vertical. With that knowledge, you can create a vertical Google Slides template that suits your presentation style and content. Learn more about other presentation software available, including our shortlist of the best presentation software.
For more resources on slide presentations, check out the following articles:
Disclaimer: The steps to make Google Slides vertically were researched in November, 2023. The screenshots are provided by the author and reflect how to perform such steps on a computer and are subject to change. Refer to Google Docs Editors Help for additional information.
