Keep your spreadsheets functional by learning how to wrap text in Google Sheets.
While Google Sheets’ default text overflow option keeps your spreadsheets neat and orderly, it can make it impossible to read your input. To prevent your spreadsheets from turning into an unreadable mess, it’s important to know how to wrap text in Google Sheets.
When the content of a cell is wider than the cell’s width, that content overflows beyond the cell’s boundaries. Once you apply text wrapping, the cell's content will be displayed as multiple lines if necessary, making it easier to read and preventing content from being cut off.
What is text wrapping?
Text wrapping in Google Sheets is a formatting option that lets you control how text is displayed within a cell. When you enter text into a cell in a spreadsheet, it might not fit entirely within the visible area of the cell, especially if the text is long.[1]
When you apply text wrapping to a cell, the content within it wraps to the next line if it exceeds the cell's width. This ensures that all the text is visible within the cell without extending the cell's boundaries. This is particularly useful for cells containing lengthy text or sentences.
Why would you want to wrap text in Google Sheets?
Knowing how to wrap text in Google Sheets is especially useful in business and work scenarios where you're dealing with textual data that might be longer than the width of a cell.
Here are some examples:
Project management: When tracking tasks or projects in a spreadsheet, task names or descriptions can be quite long. Text wrapping helps you maintain a clean layout while providing detailed information about each task.
Data annotations: When you're analyzing data and need to add annotations, comments, or explanations to specific cells, text wrapping can make sure that your comments are fully visible without needing to expand cell sizes.
Legal documents: In legal work, contract clauses, terms, and other textual content can be lengthy. Text wrapping keeps the entire text visible in the cell for easy reference.
How to wrap text in Google Sheets
Whether you need to wrap text in a cell, a row, or a column, the formatting process is fast and easy. Here’s how:
How to wrap text in a cell
Step 1: Select the cell you want to format. If there are multiple, use CTRL + select on a PC and CMD + select on a Mac.

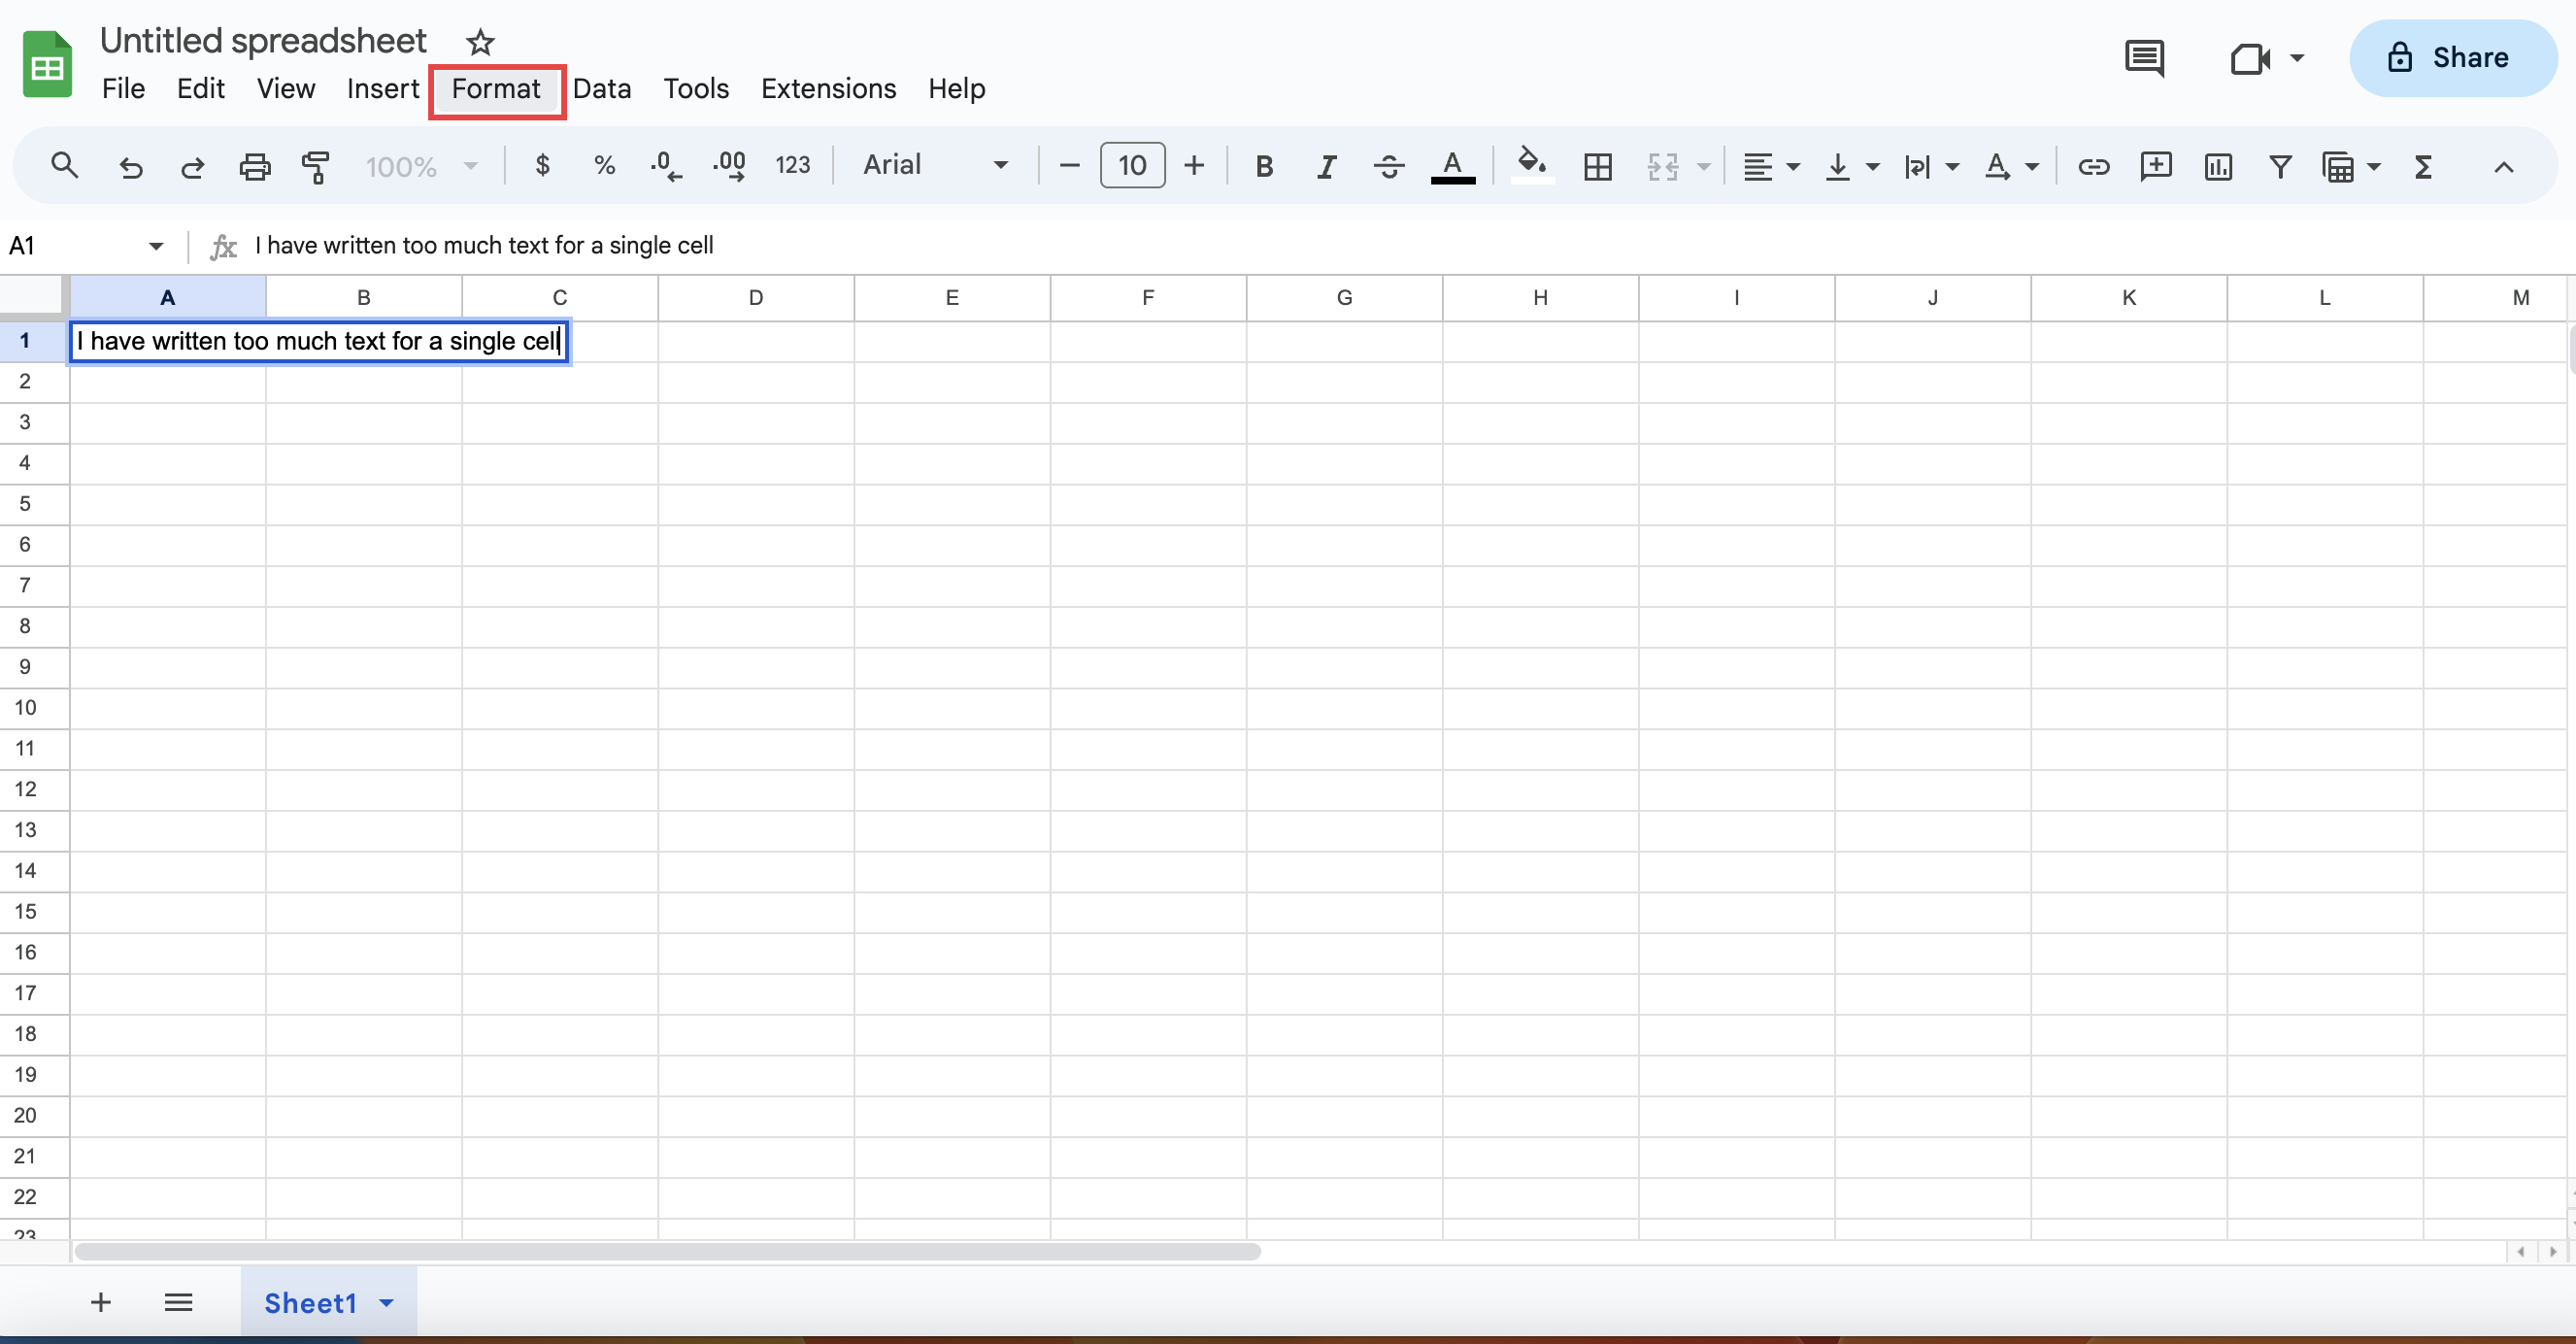
Select "Format" from the top menu. (Image provided by author.)
Step 2: Click on “Format” in the top menu.

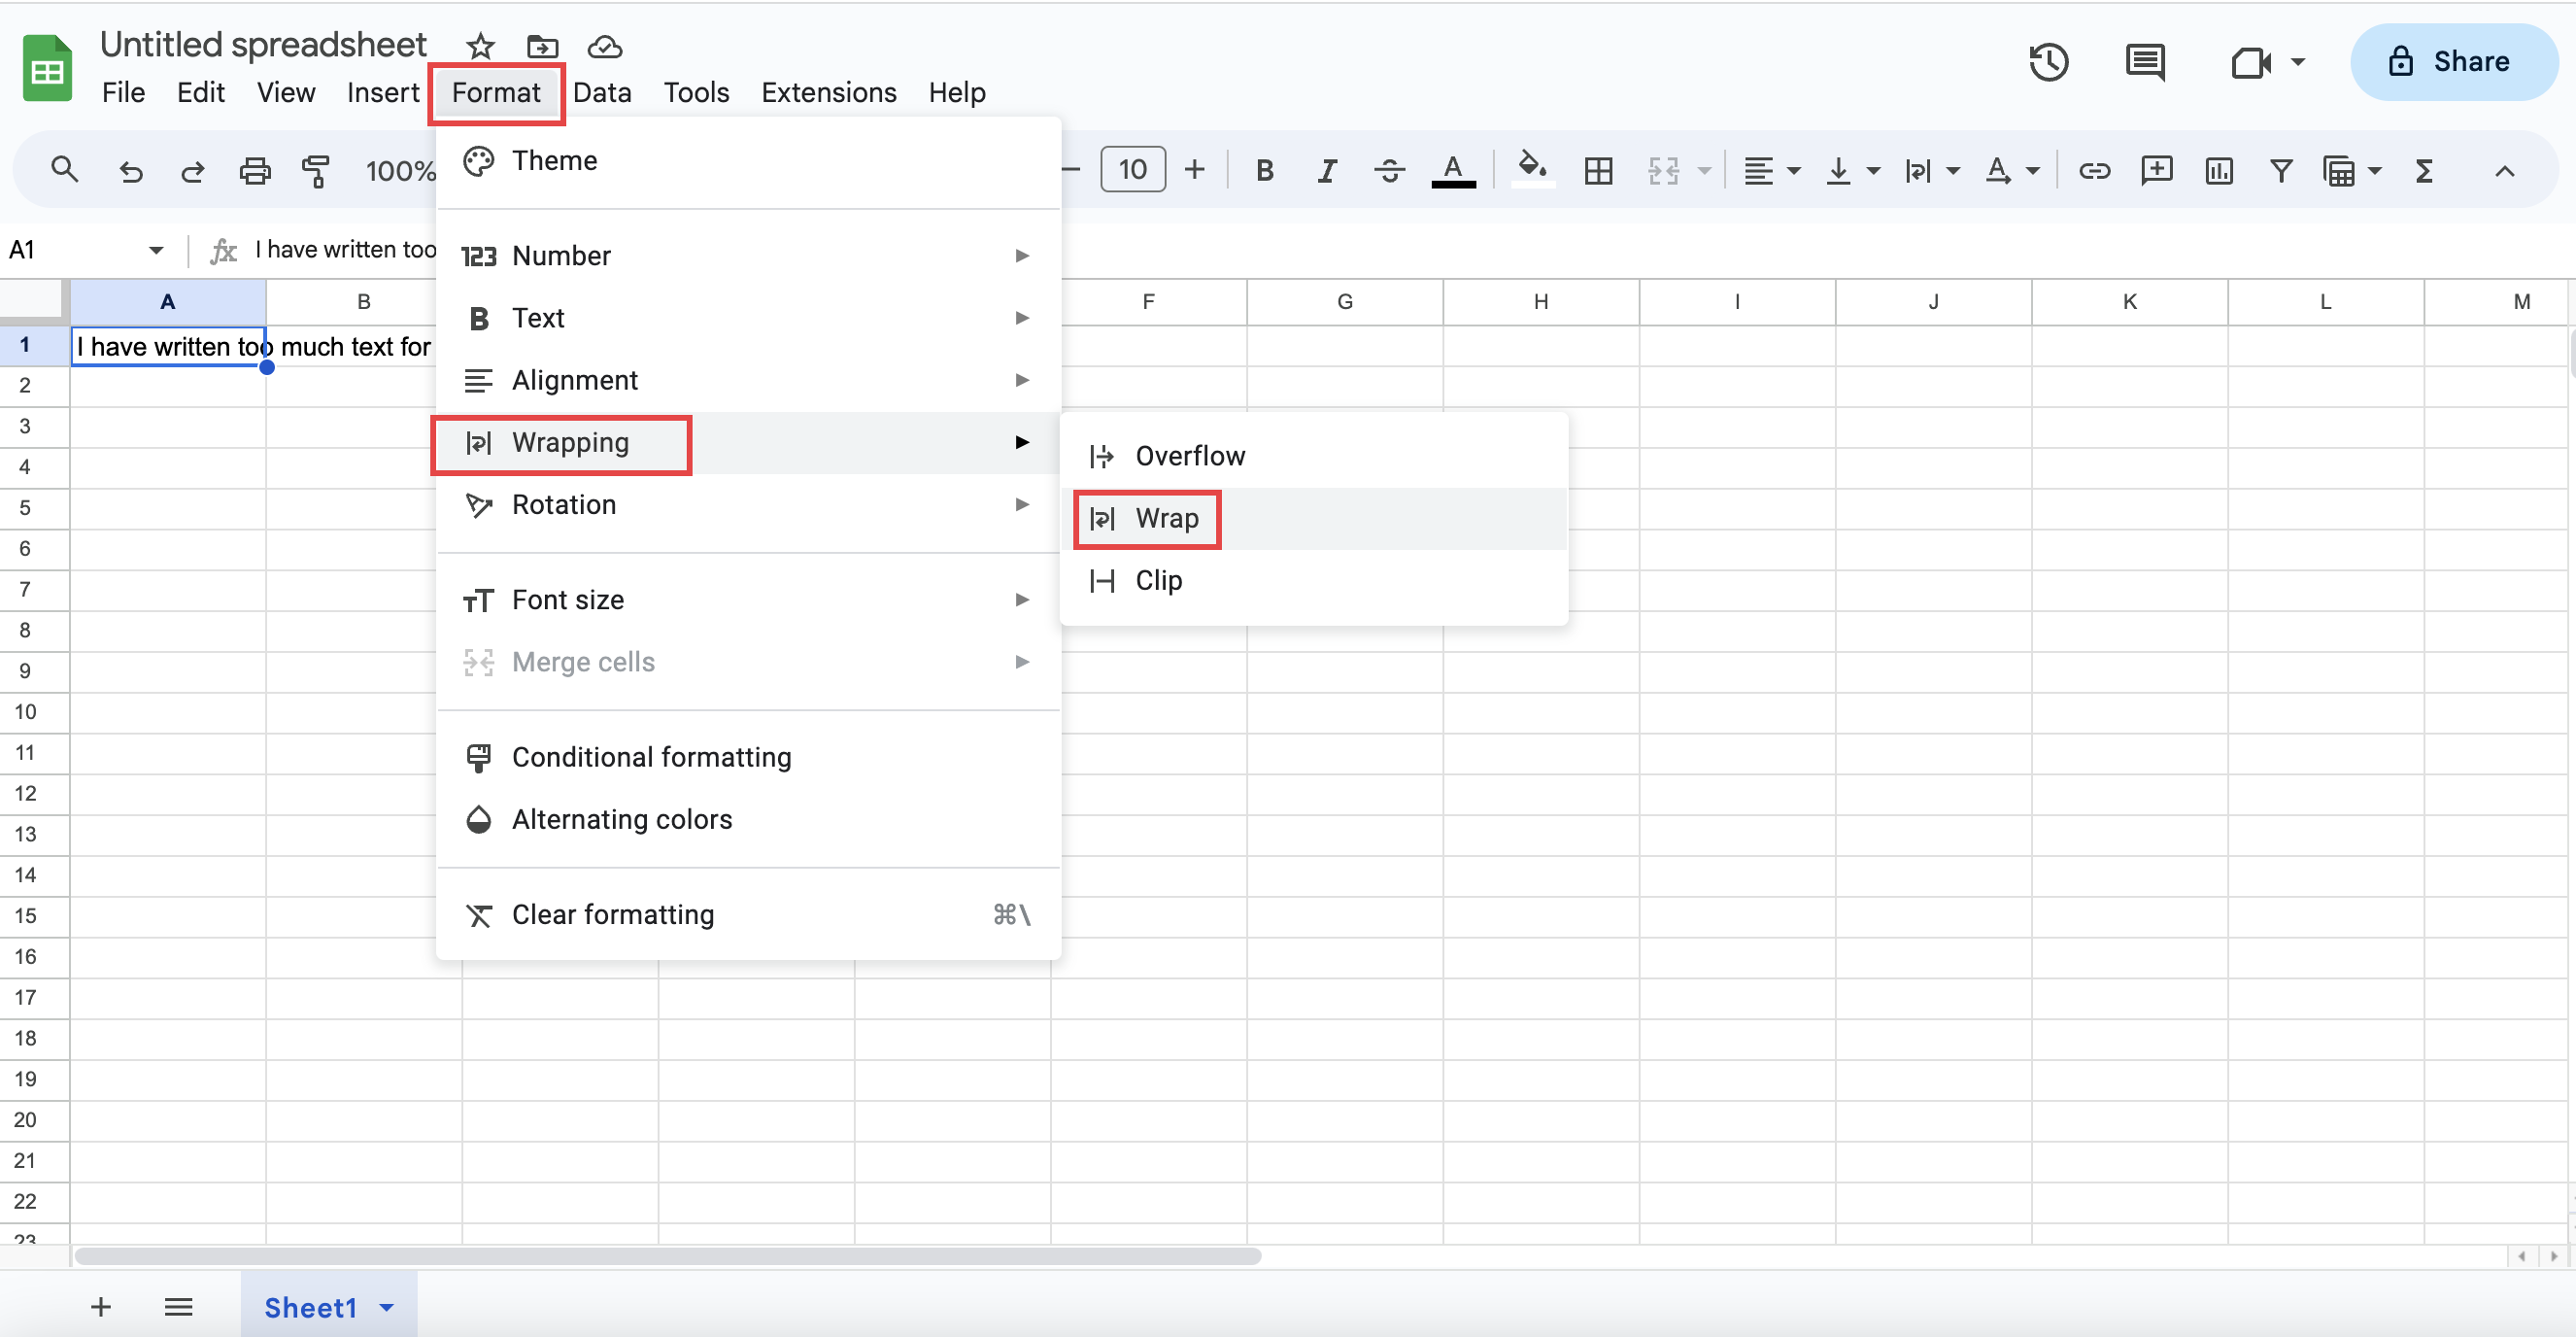
"Overflow" is the default style selected—change it to "wrap." (Image provided by author.)
Step 3: Select “Wrapping.”
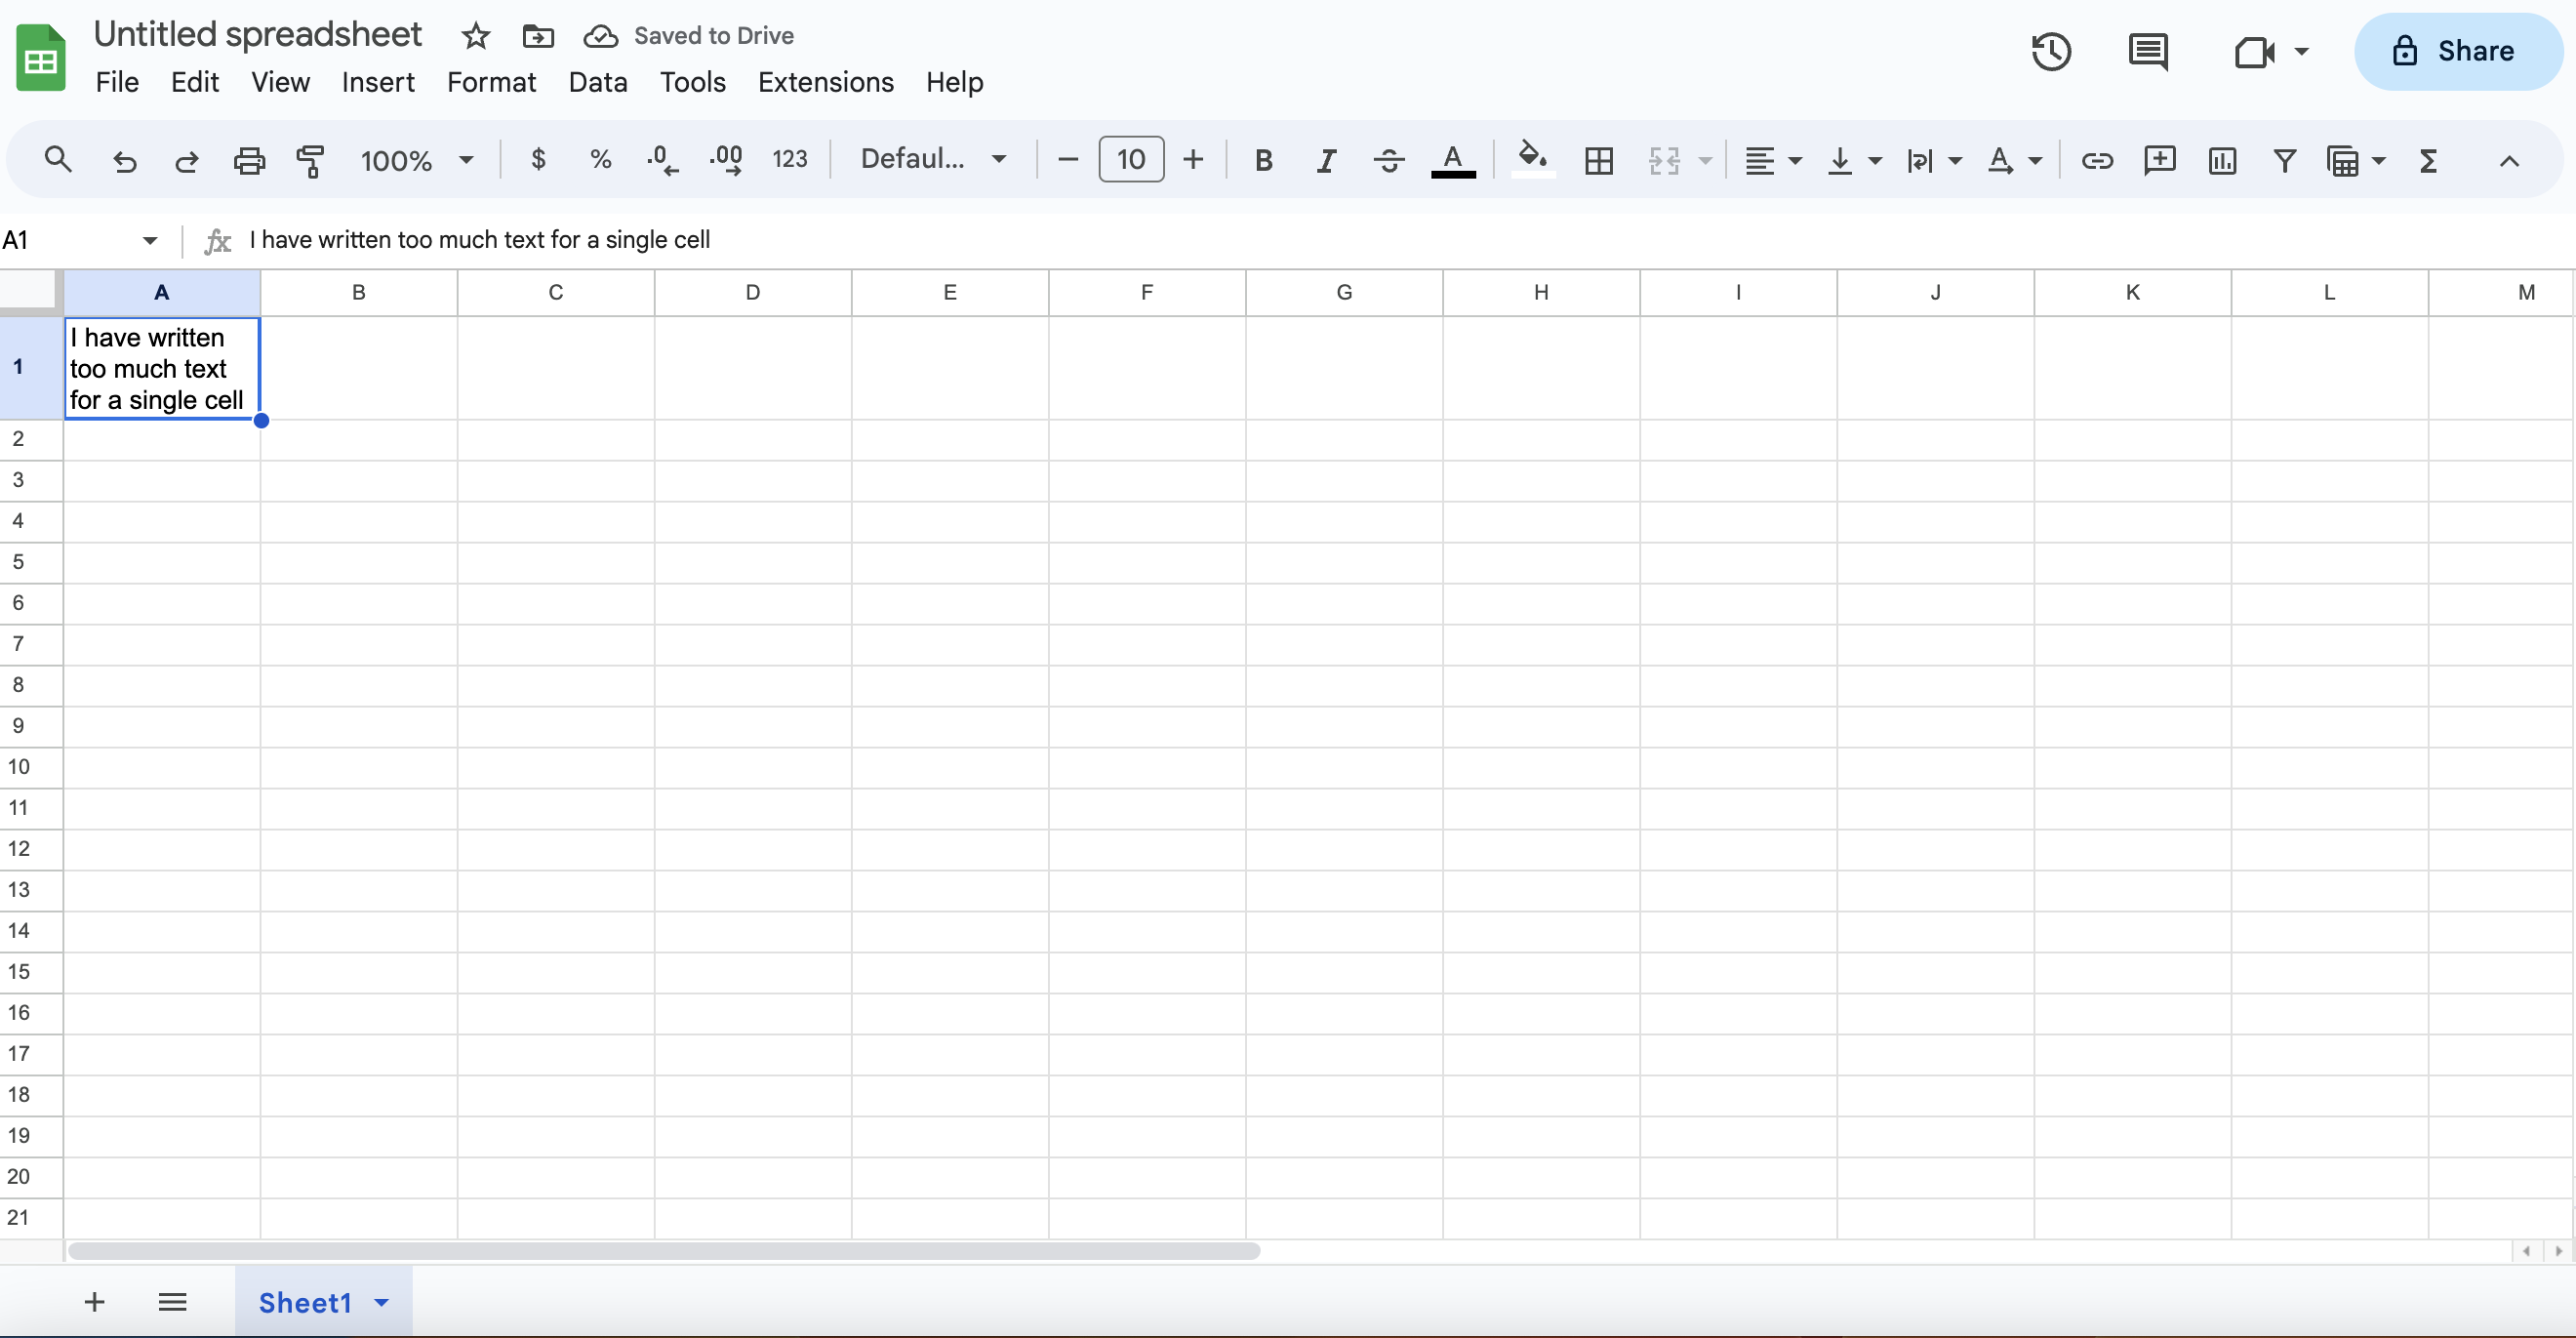
Step 4: Click on “Wrap” to apply the formatting.

Click “Wrap” to format. (Image provided by author.)
How to wrap text in a row or column
Step 1: Select the row or column that you want to format.
Step 2: Click on “Format” in the top menu.
Step 3: Click on “Text wrapping.”
Step 4: Select “Wrap.”
How to wrap text using the toolbar menu
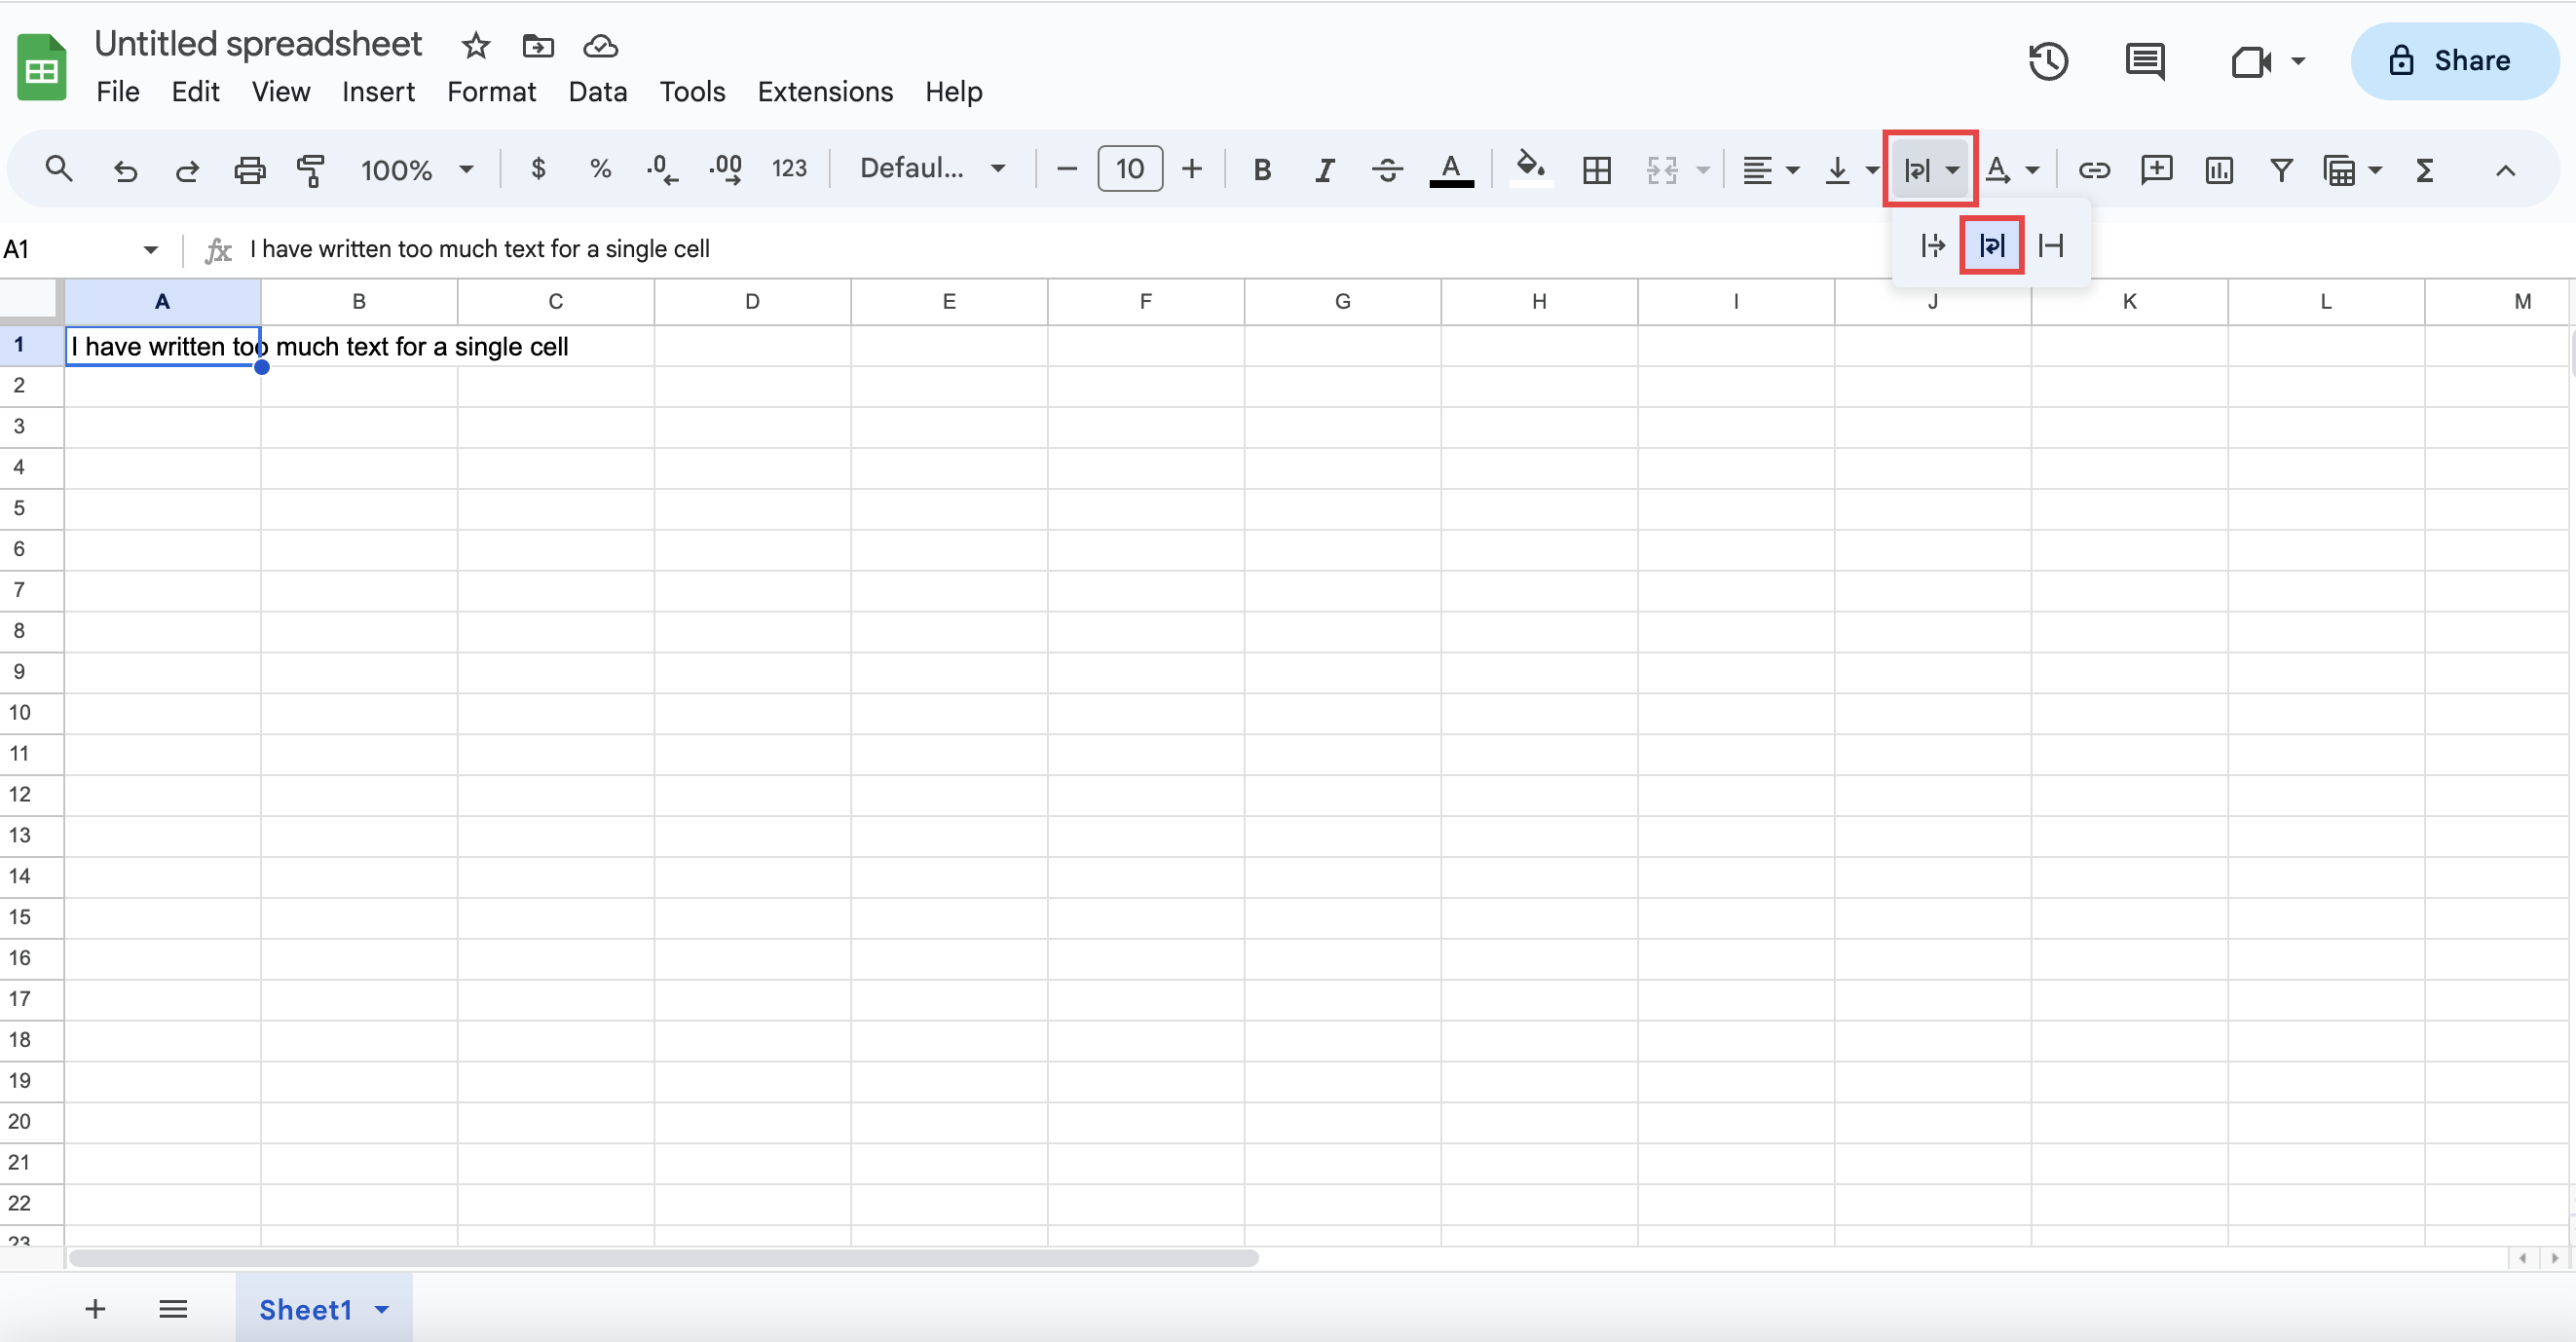
You can also wrap text in Google Sheets by using the toolbar menu's text wrapping icon.

Use the toolbar to wrap text faster. (Image provided by author.)
Step 1: Select the "Text wrapping" icon from the toolbar near the right.
Step 2: Click on the "Text wrapping" option to apply the formatting.
How to wrap text automatically
Step 1: Select the entire sheet by clicking the blank cell between column A and row 1. Alternately, press CTRL + A on a PC or CMD + A on a Mac.
Step 2: Click on “Format” in the top menu.
Step 3: Select “Text wrapping.”
Step 4: Click on “Wrap” to apply the formatting.
Additional tips for wrapping text in Google Sheets
Here are some quick tips for using Google Sheets to wrap text to its fullest potential:
Try automatic column resizing: When you apply text wrapping to a cell, consider combining it with the "Auto-Resize Column Width" feature. Double-click the right edge of a column header to automatically adjust the column width to fit the wrapped text content.
Use shortcuts: You can quickly apply text wrapping to selected cells using the keyboard shortcut Ctrl + Alt + Enter (Windows) or Command + Option + Enter (Mac).
Merge cells sparingly: Avoid merging cells too frequently, as it can complicate data manipulation and sorting. Instead, use text wrapping to accommodate longer text within individual cells.
How to prevent text from wrapping
If you accidentally apply wrap formatting to a cell, row, or column that wasn’t supposed to have it, you can change how the spreadsheet handles overflow text. Even if you’ve already applied wrap formatting, you can follow these steps:
Step 1: Select the cell, row, or column you want to change.
Step 2: Click on “Format”.
Step 3: Select “Wrapping.”
Step 4: Click on “Overflow” or “Clip.”
Overflowing the text allows it to spill out of the cell while clipping the text ensures that you can’t see any input that doesn’t fit the width of the cell.
Get the most out of your Google Sheets experience
The more you know about Google Sheets, the better you’ll be at using it for your business. Learn the ins and outs of Google Sheets by checking out these Capterra resources:

